
1. Installation Overview
1 Overview of Installation
Installation of the eReserve Plus LTI Tool starts in the eReserve Plus Configuration console. Following are the steps necessary to complete the installation.
1.1 Integration Record Creation
Creation of new integration records is done within the eReserve Plus Admin interface. You will need access to this interface to complete this step of the setup. If you do not have access then please contact the eReserve Support Team.
Each integration record contains the details for authentication (a key and a secret) and, once activated it will contain details of the LMS Instance once it has been activated.
Login to eReserve then navigate to Configure > Integrations.
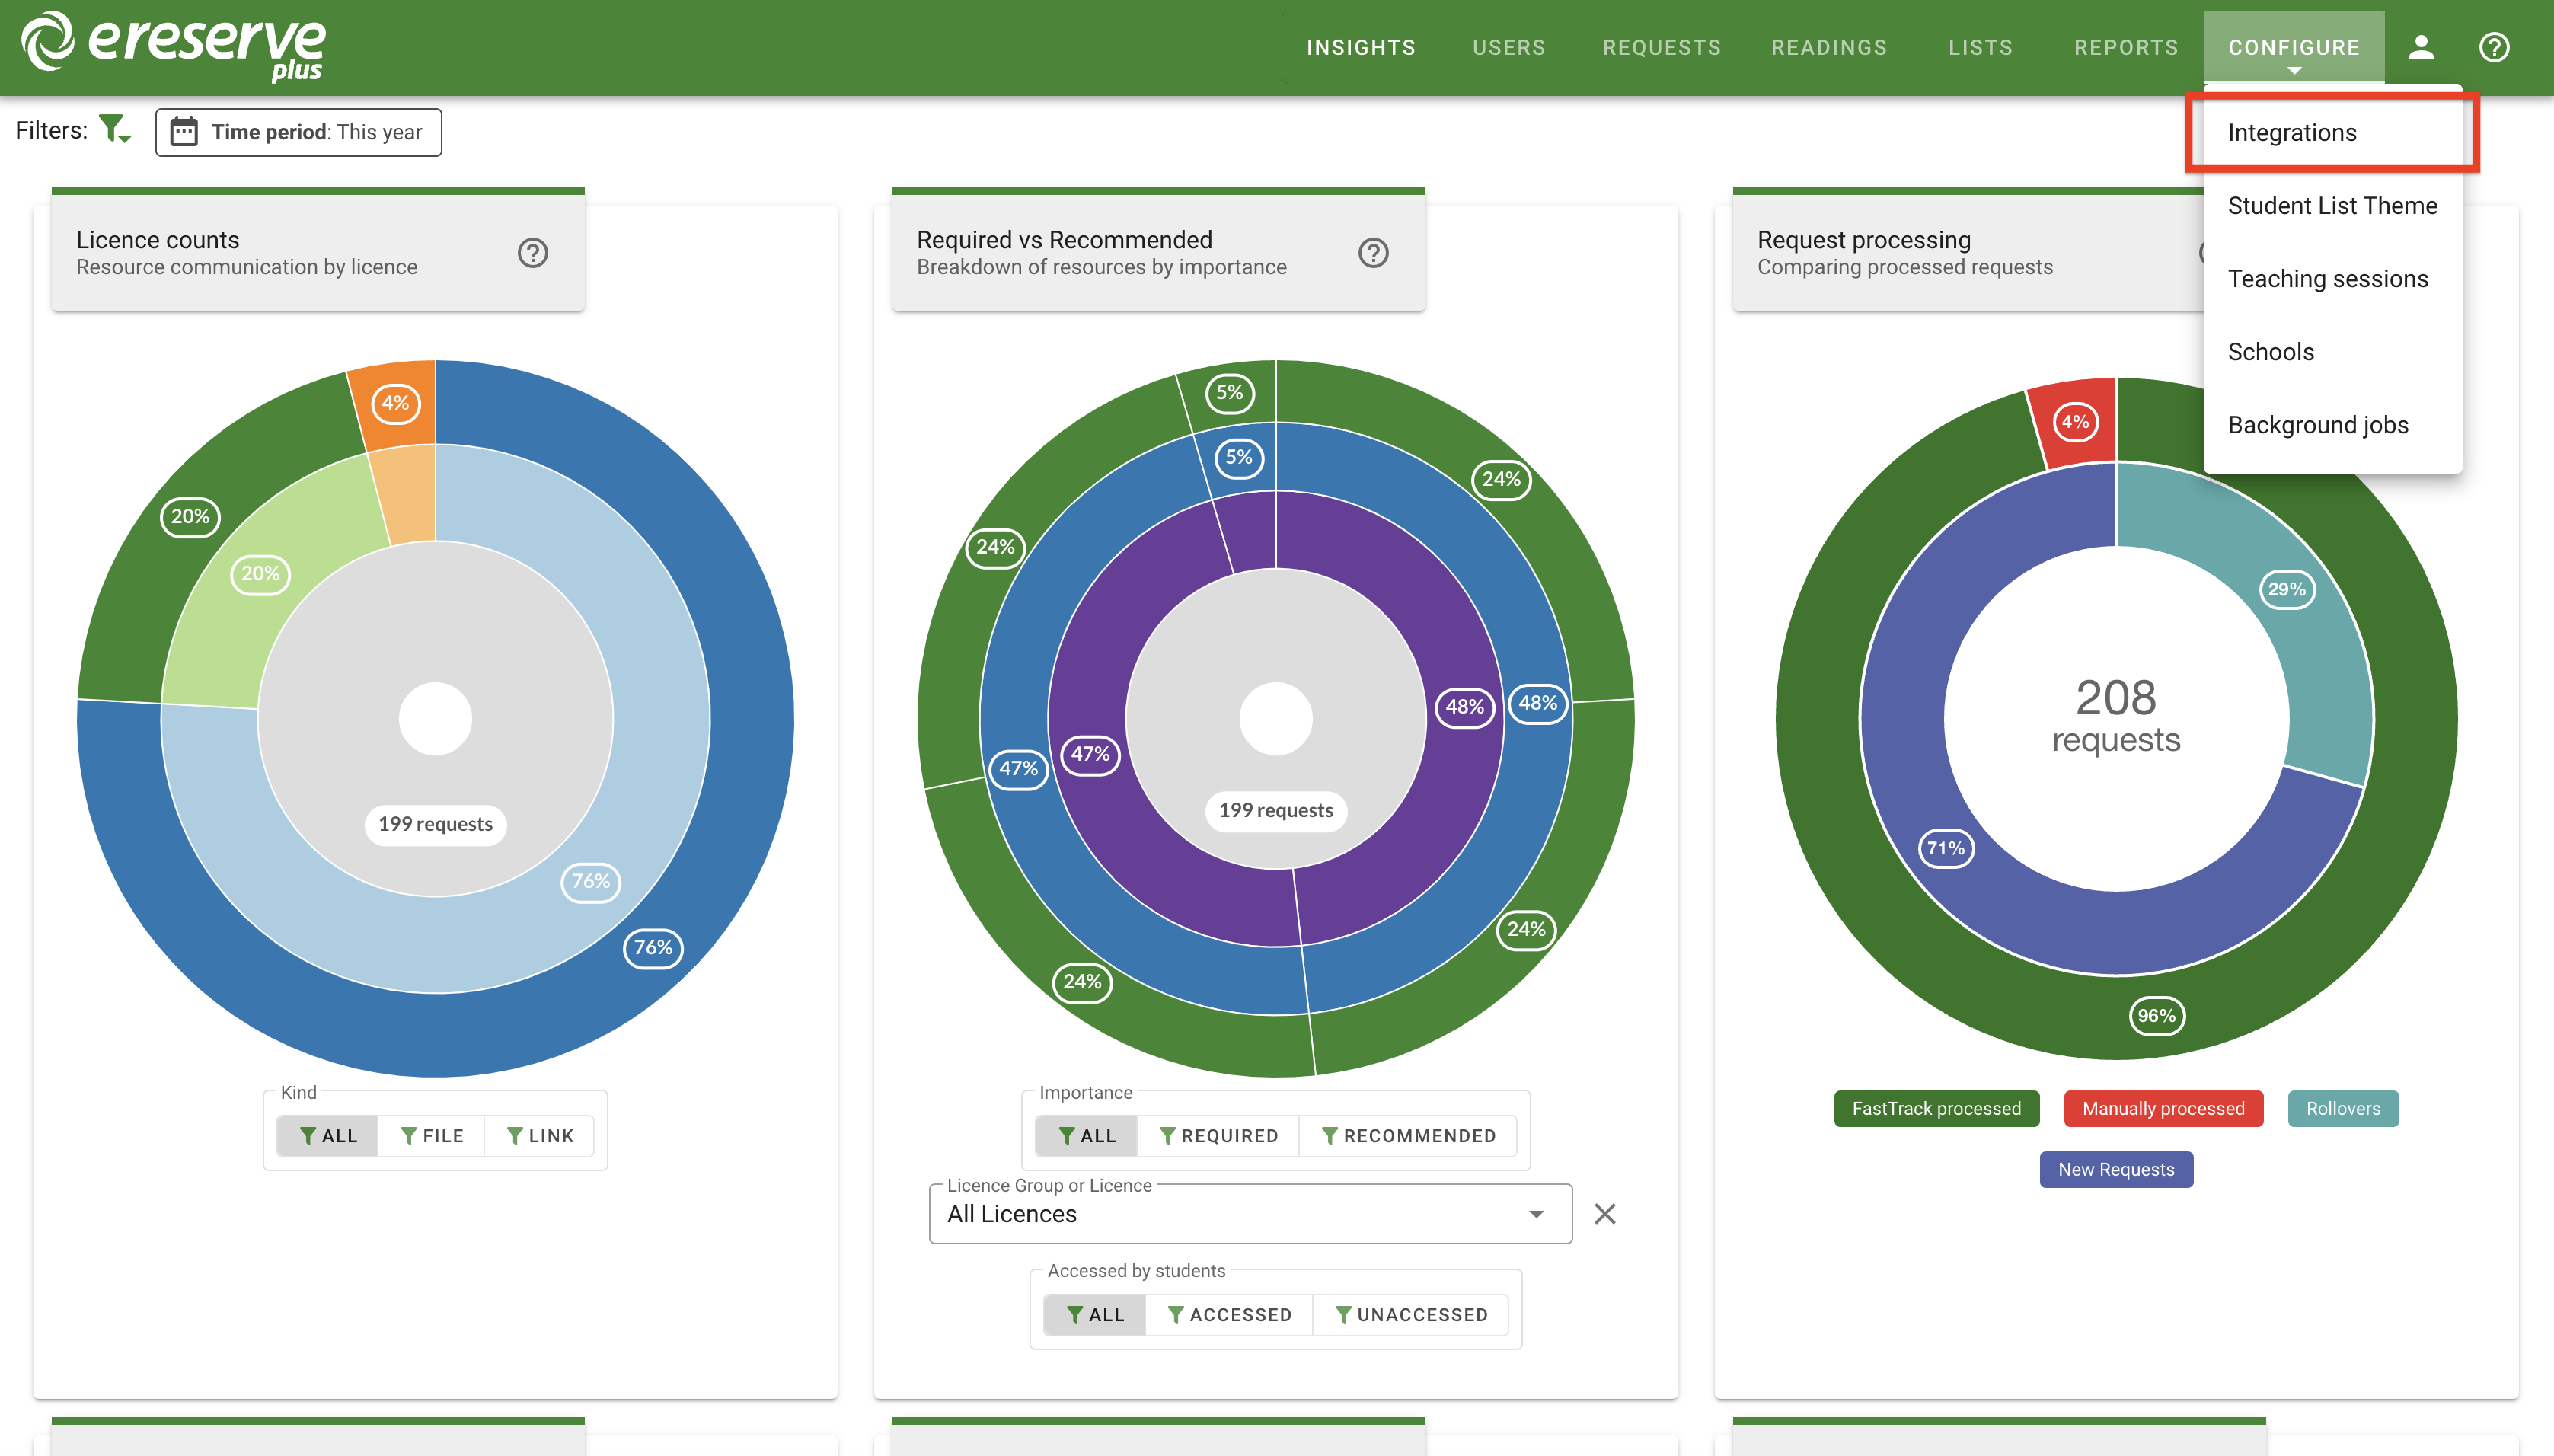
Once you have navigated to Integrations, you will see the interface pictured below.
(blank intergration screenshot needs to be added or wording above needs to be adjusted)
To start the creation process click on the New integrations for dropdown button then select IMS LTI Tool.
You'll then be presented with the form below. All you need to do is enter a name for your integration then click on the Save button. You'll notice that a key and secret have been automatically created for you. Take note of these, we'll be using them when we head over to your LMS to do the next step.
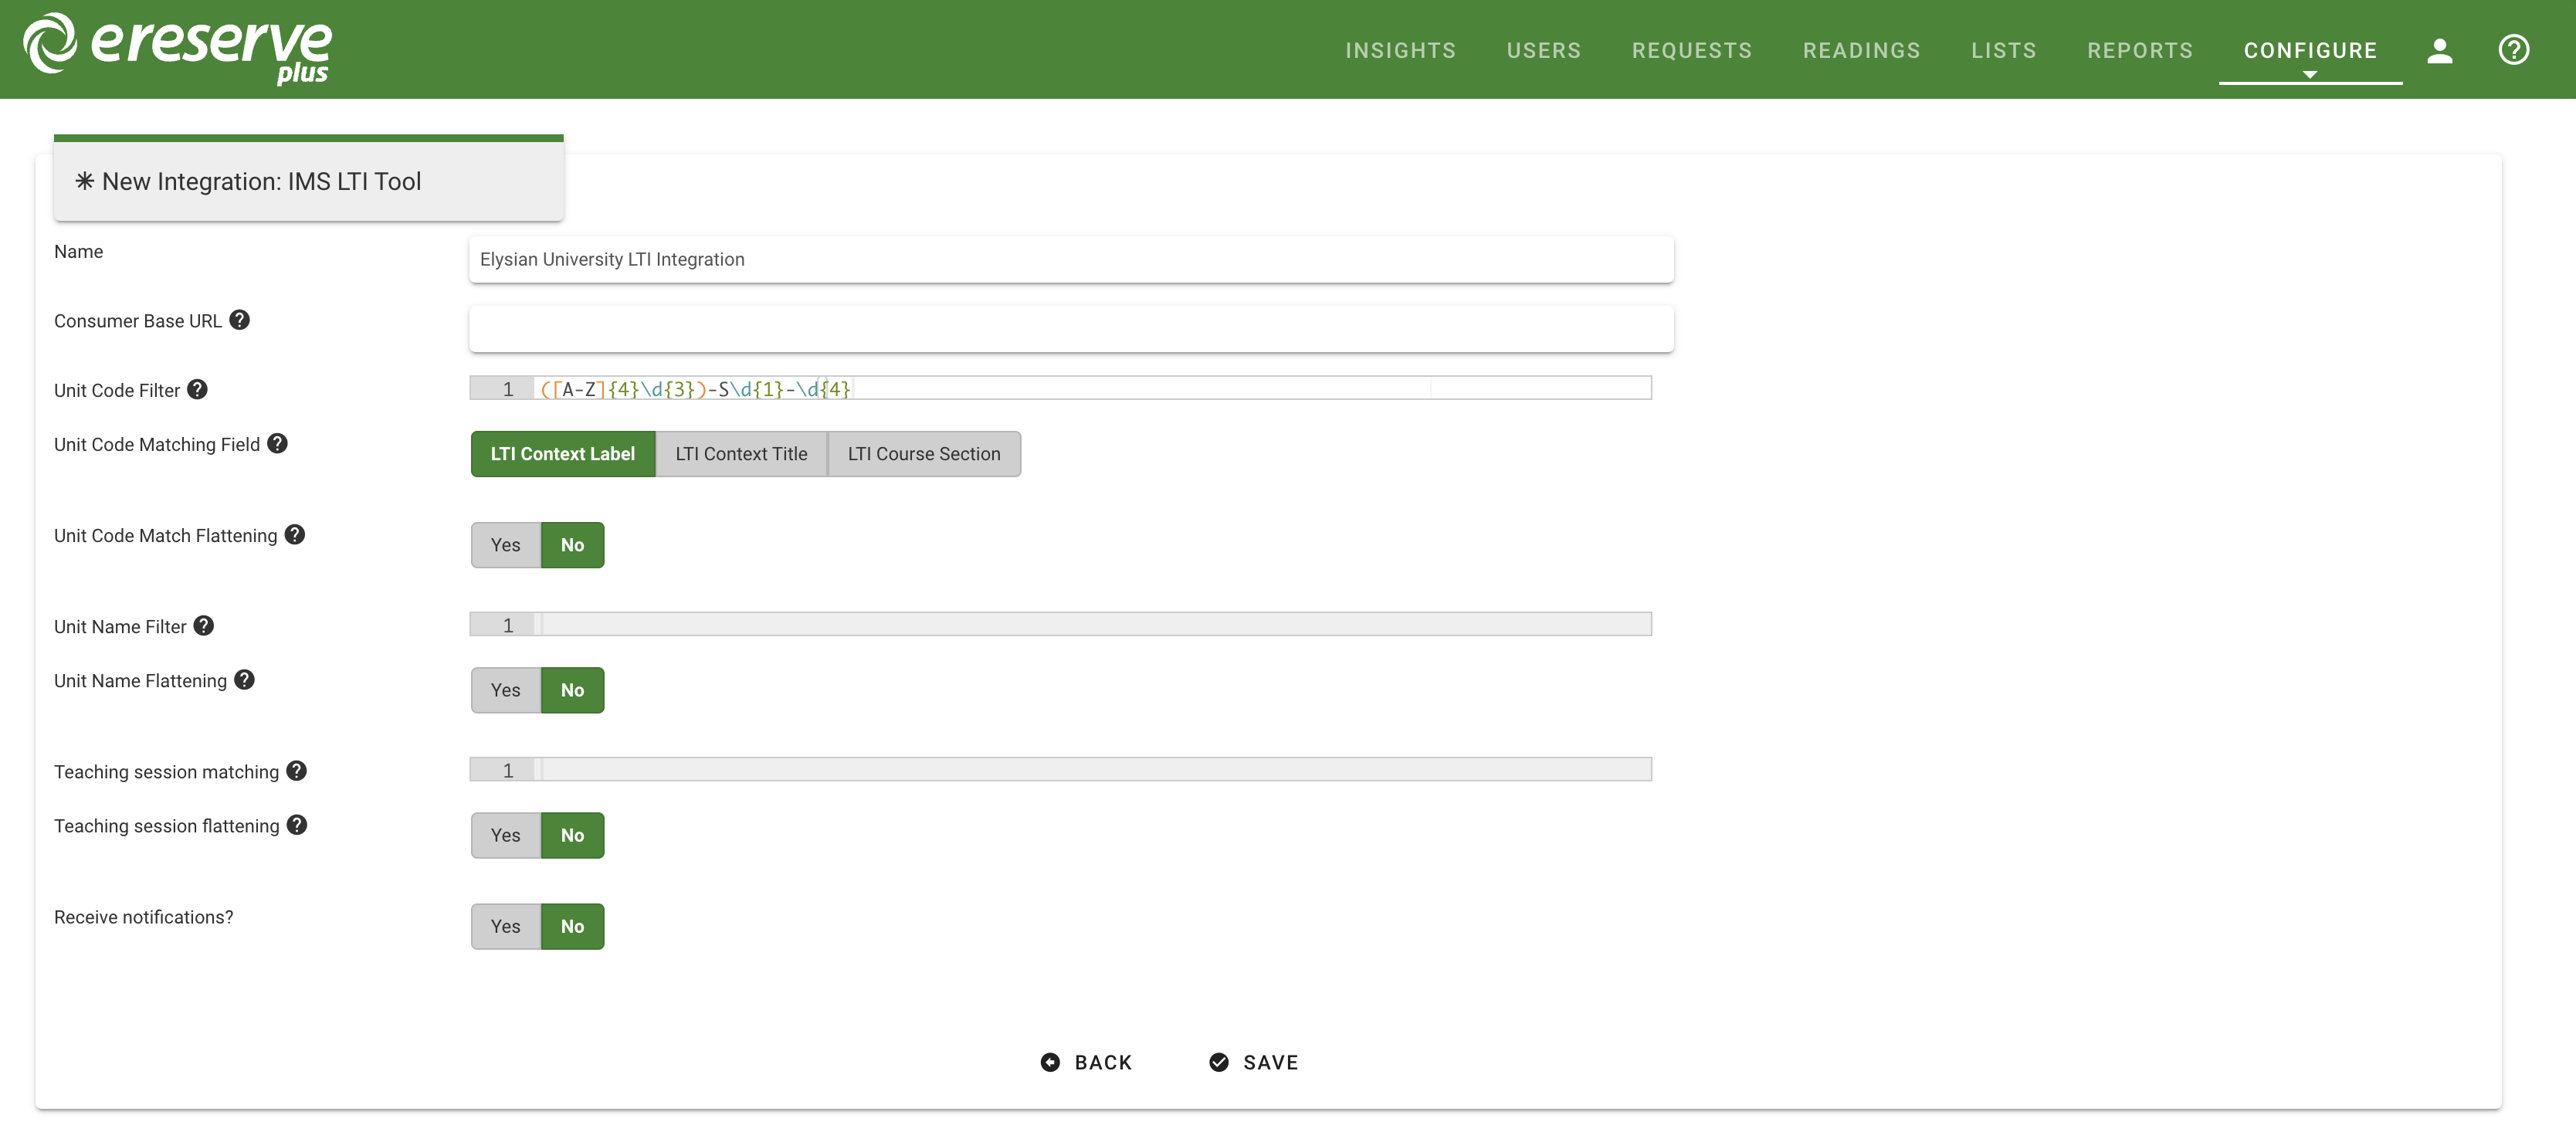
At this point it’s important to note that each instance of your LMS will need its own integration record created in eReserve. So if you have 3 instances of your LMS you’ll have 3 integration records in eReserve. Once an integration record has been activated it can only be used with the LMS instance that it was activated from. So using those credentials for another LMS Instance will fail.
1.2 Installation in your LMS
Each LMS that supports IMS LTI 1.1+ has its own specific installation requirements. With this in mind we’ve created instructions for each LMS that we support. These can be found in section 3 of this document onwards.
1.3 Reading list access management
Every user from your LMS has a role as defined in the LTI standard (see LTI Role Vocabularies). The role is passed to eReserve Plus at the time a user accesses their Reading List in eReserve Plus. Subsequently this role is then used to dictate what features the user has access to in the reading list. Currently there are two access levels defined in eReserve Plus: Student and Academic. The Student role provides read only access to the Reading List where as the Academic access provides a fully featured reading list management interface. You can manage this access simply by editing your LTI Integration record once it has been activated through the eReserve Plus Integration Management. Once you’ve started editing your LTI integration, you will see a LTI Role Access console to manage like the image below.
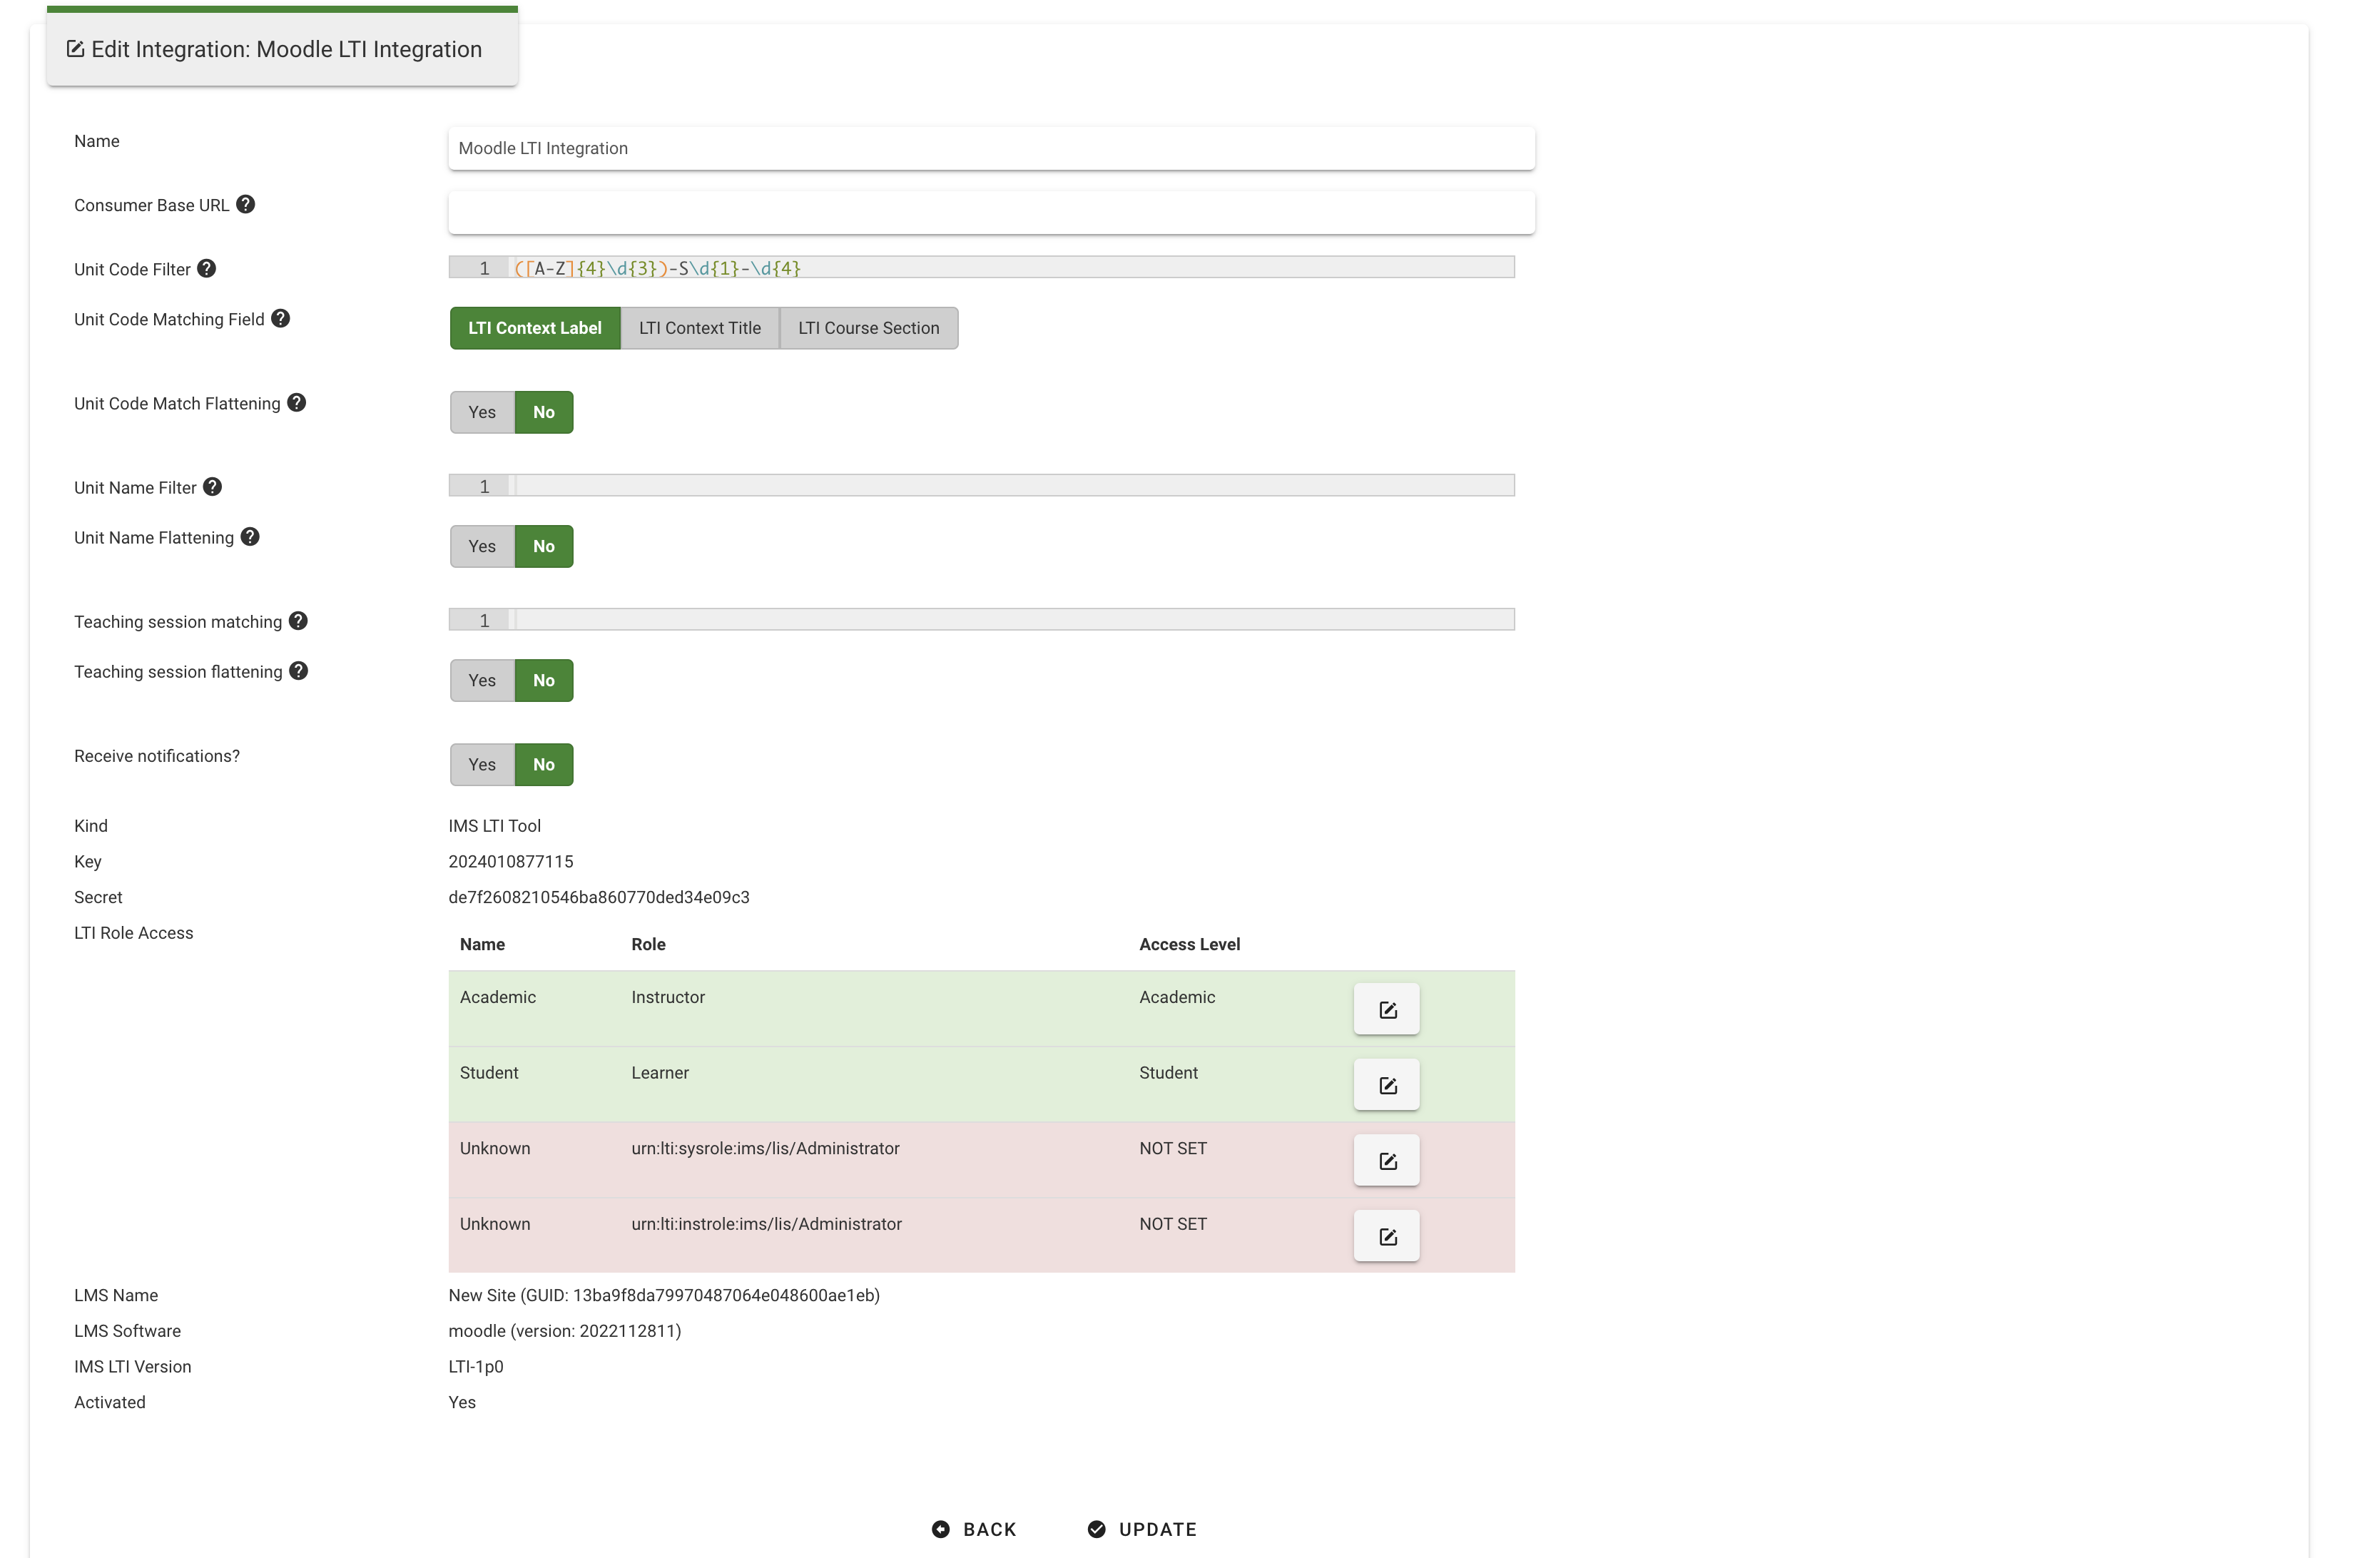
You’ll note the list of LTI roles with their associated access level. Rows that are green have had their access level set and those that are red have not. To set or change the access level it’s just a matter of clicking on the edit button. Once clicked you’ll see the form below.
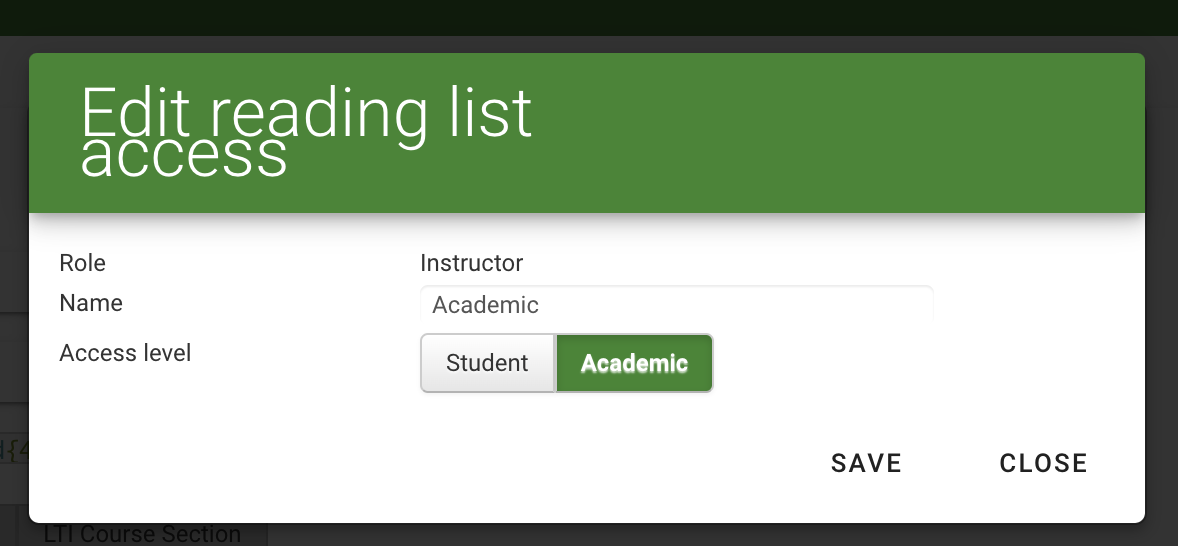
Change the name as needed and select an appropriate access level then click on the save button and you're done. This will be updated immediately and end users will see the change.
The first time an LTI role attempts to access eReserve Plus, the role will be made available in red as per the screenshot above until the Role is mapped in eReserve Plus to a Student or Academic; at which time it which will become green (authorised). If there are Roles in your LTI which have not become available in eReserve then login using the LMS using the appropriate role and select the Reading List activity to initiate the first access of eReserve Plus.
1.4 Reading lists, course codes and course names
When displaying the Reading Lists eReserve Plus will use the course code from your LMS to know which Reading Lists to display. For a lot of Institutions the course code will change each time it is offered. For example, a course code for one offering may be CS101_S2_2014 and the next offering the course code may be CS101_S1_2015. There are commonalities, however they are unique to the offering of the course and will mean that eReserve Plus will not have any historical lists for the new code. This is solved in eReserve Plus through its course code filtering.
1.4.0 Course Code Prefix
In very special circumstances a prefix can be added to all course codes connecting from the integration. If utilised all course codes originating from the integration will have the prefix added and all course code filters will have to be setup based on the prefixed course code.
1.4.1 Course code filter
To map a newly created offering to a base code, eReserve Plus has a filtering mechanism that allows you to match the new offering to the base course code (e.g. CS101 in the example above). To set the filtering simply edit the associated integration record in the Intergration Management interface and complete the Course Code Filter field. To create a filter you will need to provide a Regular Expression. You can use tools like Rublar to test your regular expressions before applying them to your integration record.
NB: It’s important that this course code filter is correct otherwise it will lead to incorrect display of Reading Lists. If you are not comfortable with creating a regular expression then please contact the eReserve support team.
1.4.2 Course code filter - Multiple Matching Groups
LTI1.3 integrations support additional flexibility in course code filters. The Multiple Matching Groups switch allows the supplied regular expression to match more than one part of the course code and course name.

1.4.3 Course code matching field
The majority of Learning Management Systems will send the Course Code via the LTI Context Label and the Course Description will be in the LTI Context Title. If the Base Code is only available within the Course Description this option sets which LTI field is processed by the Course Code Filter.
1.4.4 Course code matching field - Multiple Matching Fields
LTI1.3 integrations allow you to select which fields the course code filter is applied to, and can match on multiple fields. Check the boxes for each field that the Course Code Filter regular expression will be applied to.
The combined course code fields are joined together using ~~, before the regular expression is applied. e.g:
LABEL~~TITLE
BMKG201~~Marketing
1.4.5 Course code match flattening
If set to yes all text captured by the regex is joined together in the resulting Base Code.
1.4.6 Example course code filter
This example is based on a course code with the format below.
<base_code>_<teaching_period>_<year>We'll be using the following course code samples for testing Rublar: CS101_S2_2-14 and CS101_S1_2015. Below is a test of the regular expression created for filtering.
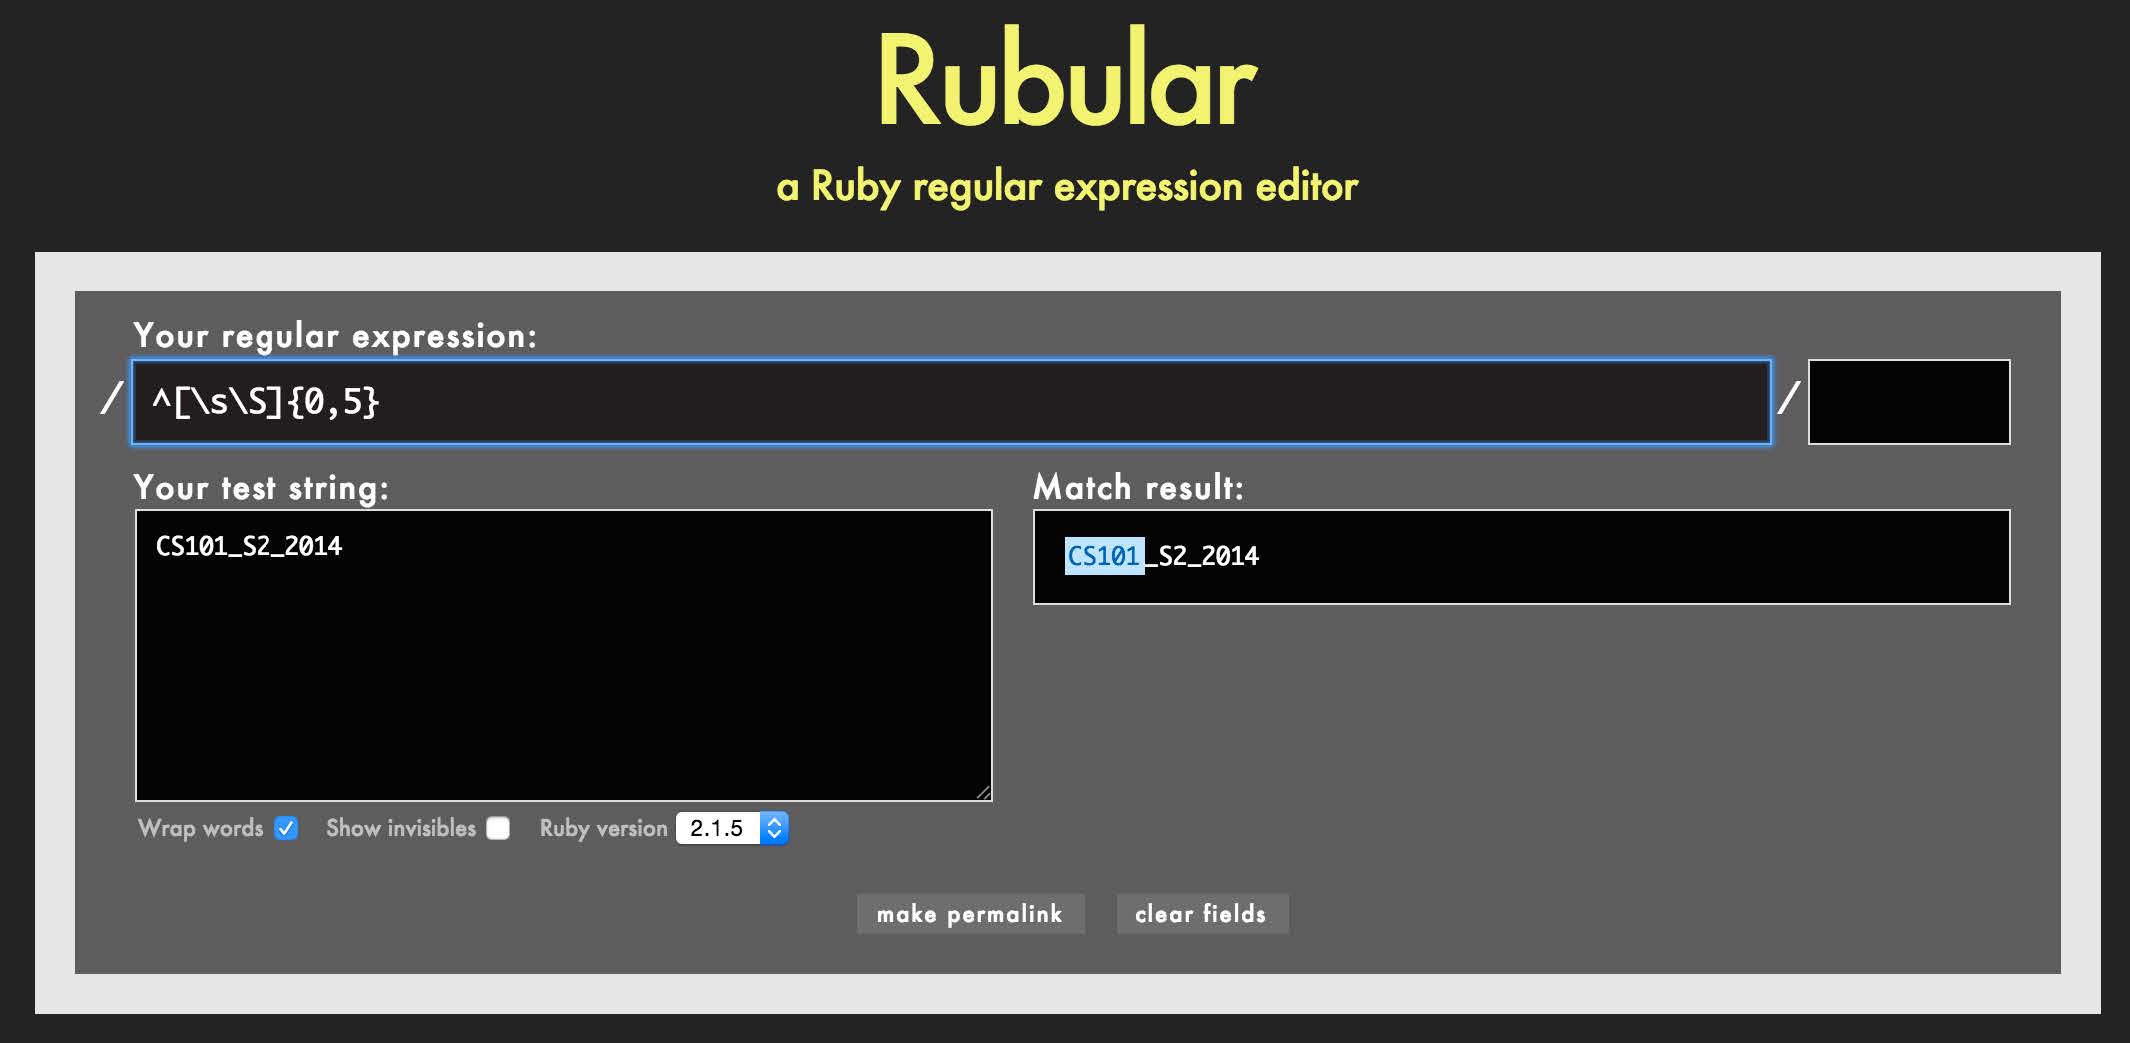
As you can see our regular expression (i.e. ^[\s\S]{0,5} ) has matched the base_code and we can now apply it to our integration record simply by entering it in the Course Code Filter field then saving the integration record. So every time the course is offered eReserve Plus will only look at the base_code when choosing a reading list to display.

1.4.7 Course name filter
The LTI Course Name Filter allows unnecessary detail and other content about the course to be removed from the course name displayed within eReserve Plus.
When utilised the LTI Course Name filter allows the display of course long names to be modified to fit the display requirements of the reading list within eReserve Plus. Long course names can be modified to better fit the layout, course code and reading list display within the eReserve Plus interface.
1.4.8 Course name match flattening
In the same manner as the Course Code Filter if set to yes all text captured by the regex is joined together in the resulting course name.
1.4.9 Example course name filter
The Course Name Filter can be designed to remove the Course Code and Time Period from the Course Name. The matched string for the Course Name would be Civil and Criminal Procedure.
^[\s\S]{0,5} ([^-]*) - .*20\d\d$When eReserve receives the LTI handshake from the LMS, it will receive the string CS101 Introduction to Computational Theory - Semester One 2015, however it will only store and display Introduction to Computational Theory.
