
Configuring Schools
Summary: This will outline how to add and configure schools in eReserve Plus.
So that eReserve can generate meaningful audit and utilisation reports, eReserve Plus groups the Courses into schools. Adding the current schools into eReserve Plus allows the faculty and library staff to select the appropriate school membership for their Course.
School Creation
Admin staff with the role of either "Document Manager" or "Copyright Officer" will be able to create new Schools/Departments. Under the Configure drop-down menu, the Schools section will allow admin staff to create new schools and manage existing schools with ease.
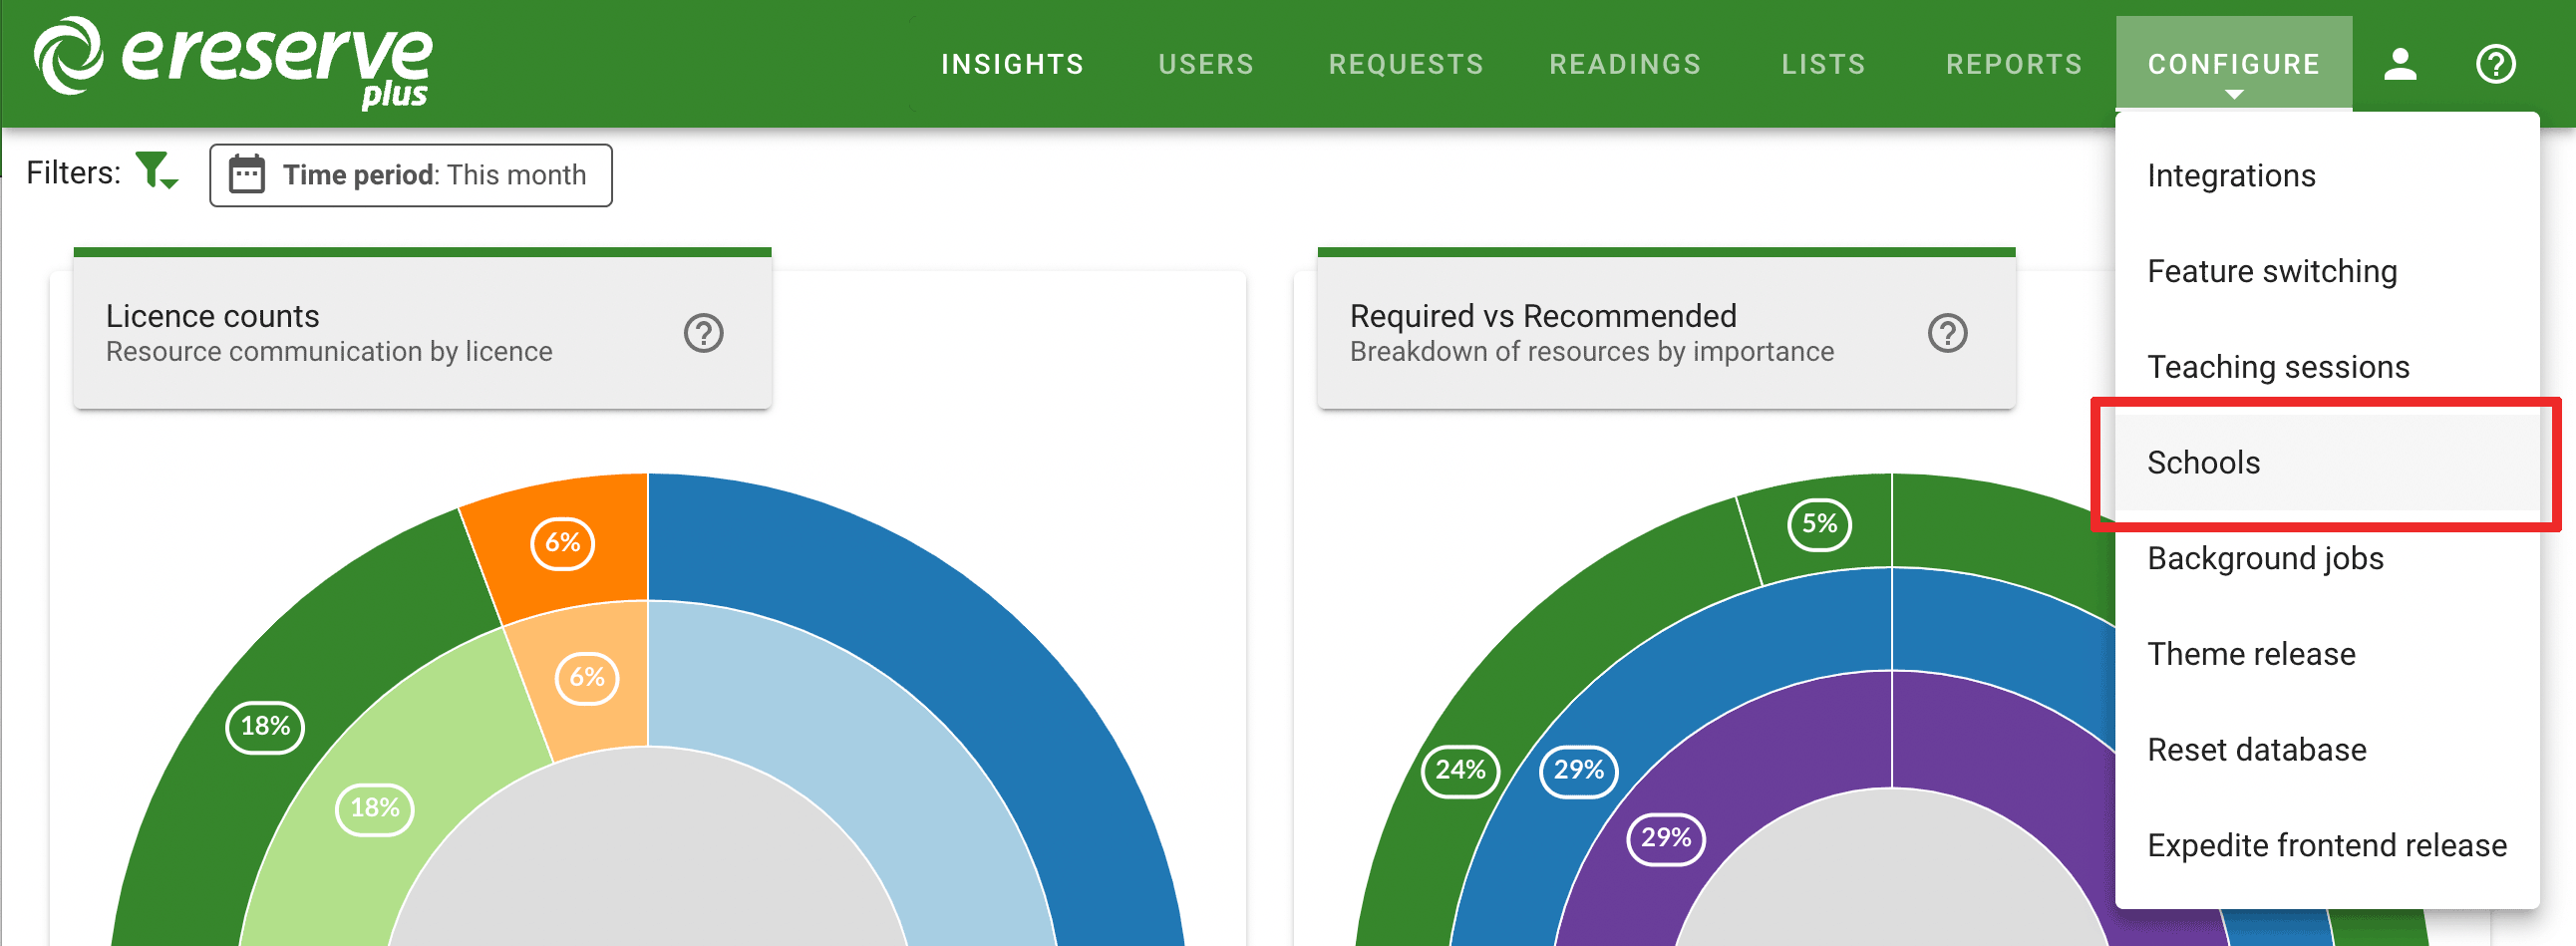
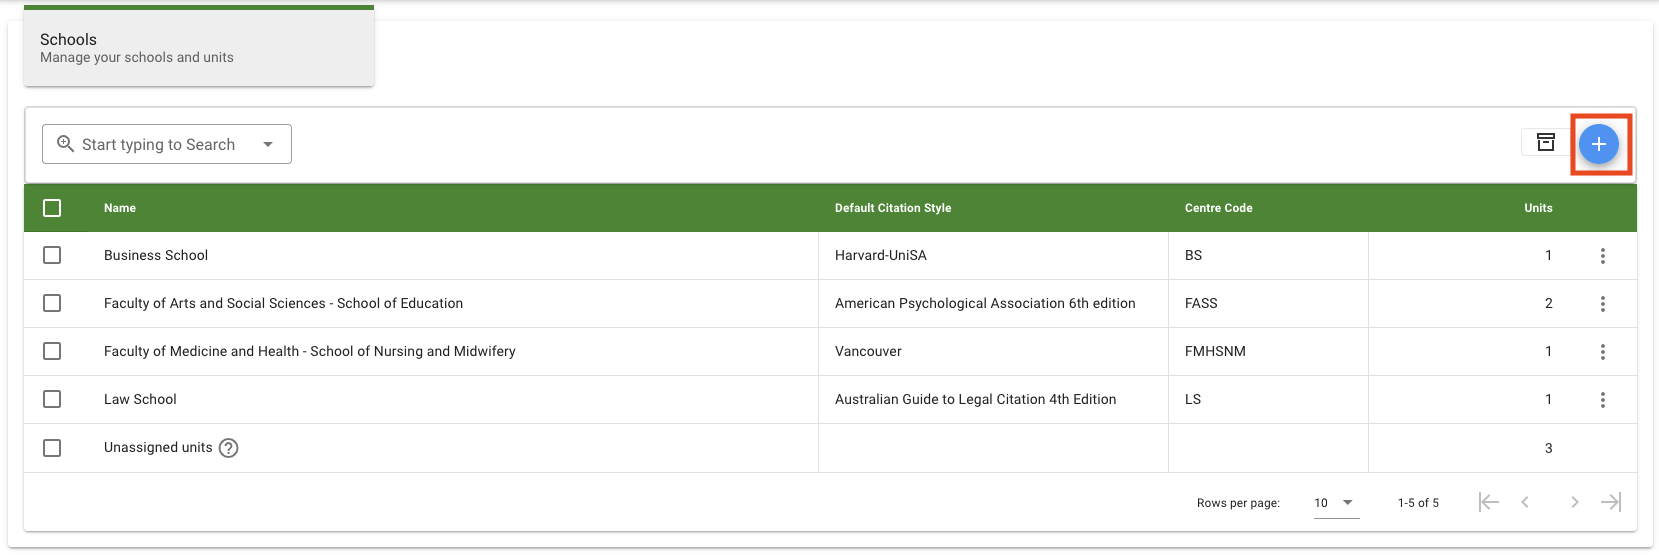
Once you have navigated to the schools interface, you can follow the steps below to create a new school.
1. Click the blue + button located on the top right.
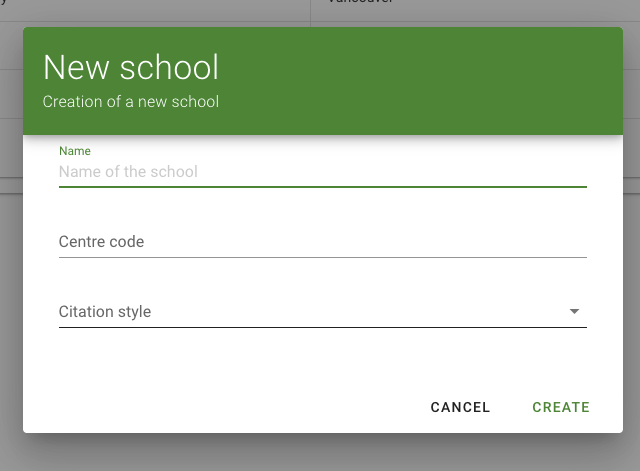
2. Enter the name of the school in the 'Name' field.
3. Enter a Centre Code. This is a short abbreviation for each school if available (optional)
4. You can select the default "Citation Style" (optional).
5. Then click the "Create" button.
Managing Schools
Edit an Existing School
Existing schools can be edited either by double clicking on any section of the row for a given school, or by clicking the vertical ellipsis button at the end of a row and selecting the Edit option. Using either of these methods will display a popup where the school name, center code and citation style can be updated.
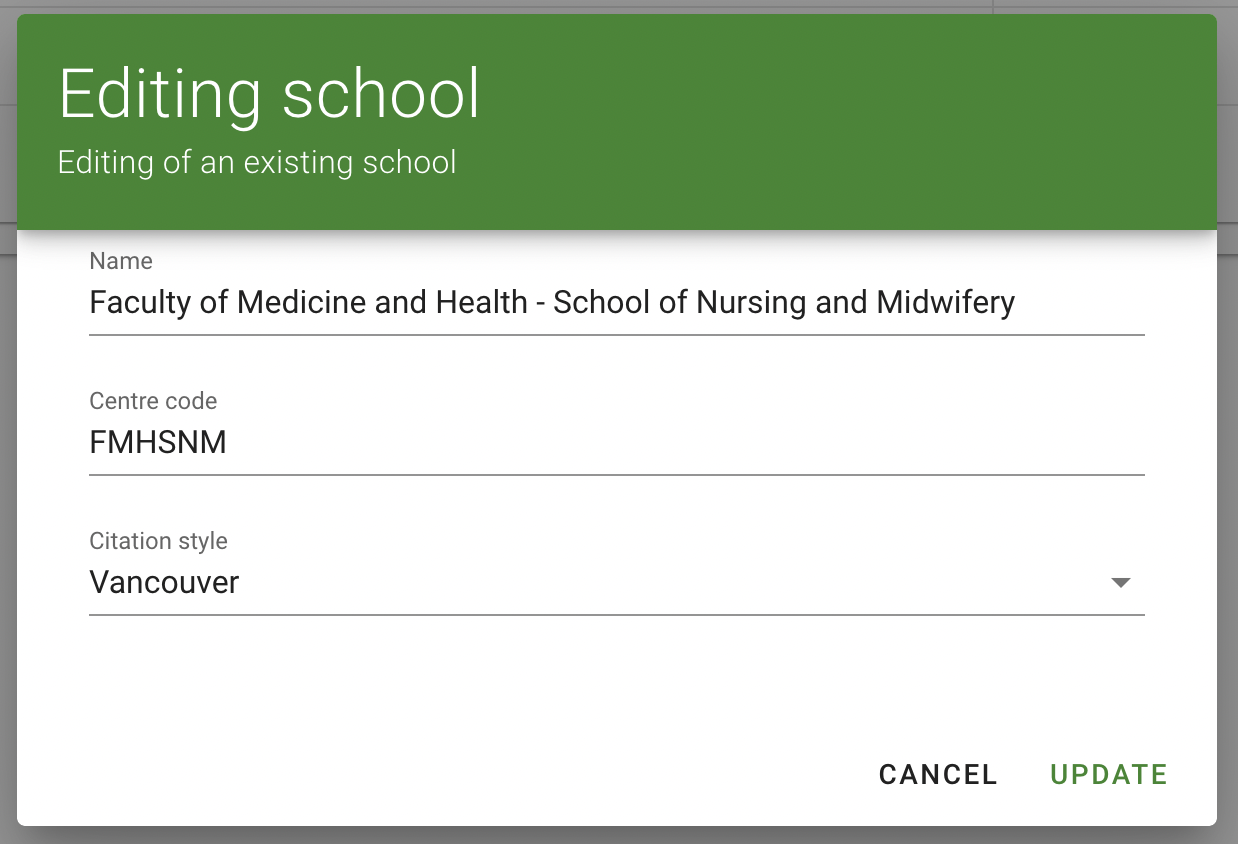
Clicking the Update button will save the new changes, and clicking Cancel button will close the popup without modifying the school.
Search
Schools can be filtered by using the search function which allows Library and Admin Staff to search for schools by Name, Centre Code, Citation Style, or across all fields by using the Any option.
When typing a search term into the field, a dropdown menu will appear with each of the field and filter type options.
Selecting a search field option with the 'contains' filter type, will return results that are a partial match for the search term. Selecting a search option with the 'is' filter type, will only return results that are an exact match for the search term.

After entering a search term, select a search option from the dropdown list to apply the specified filter and update the schools list.

The selected filter appears above the schools list and indicates the search term and type of search. The filter can be removed by clicking the x on the filter label. All filters can be removed by clicking the red delete icon on the left.
Course Counts
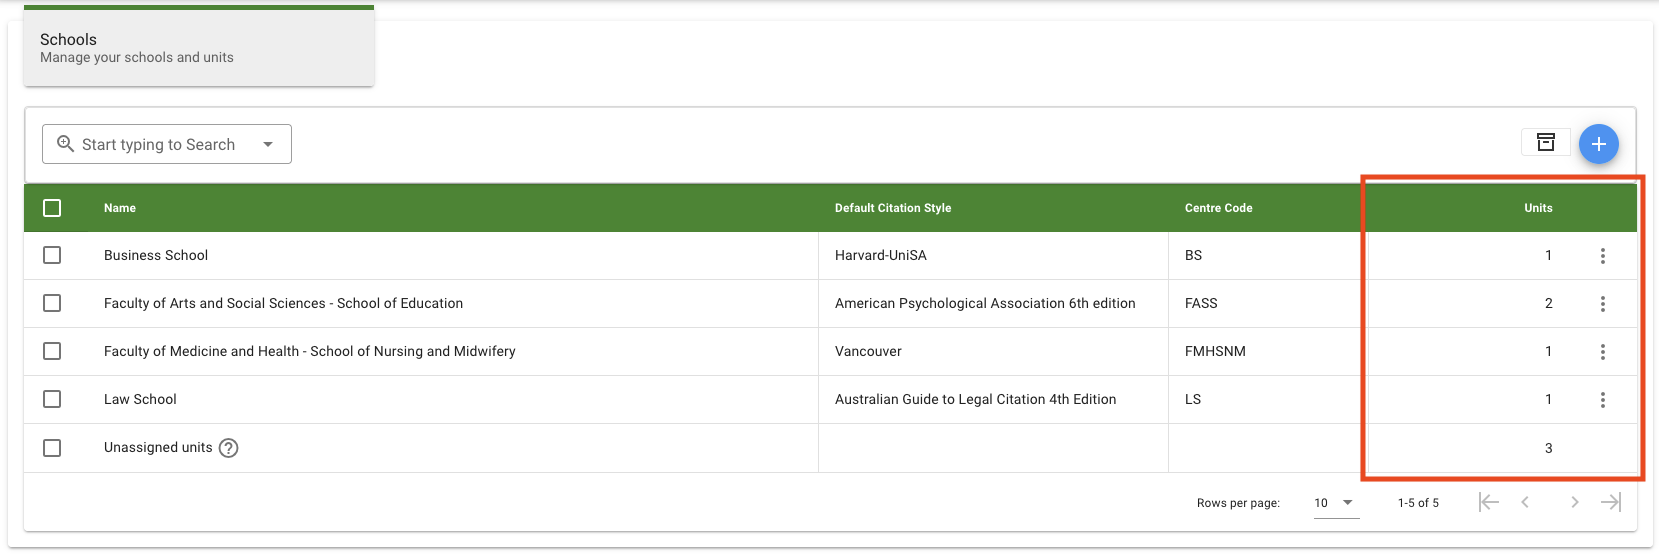
The column located to the right hand side labelled Courses indicates the number of Courses currently assigned to each school.
Unassigned Courses
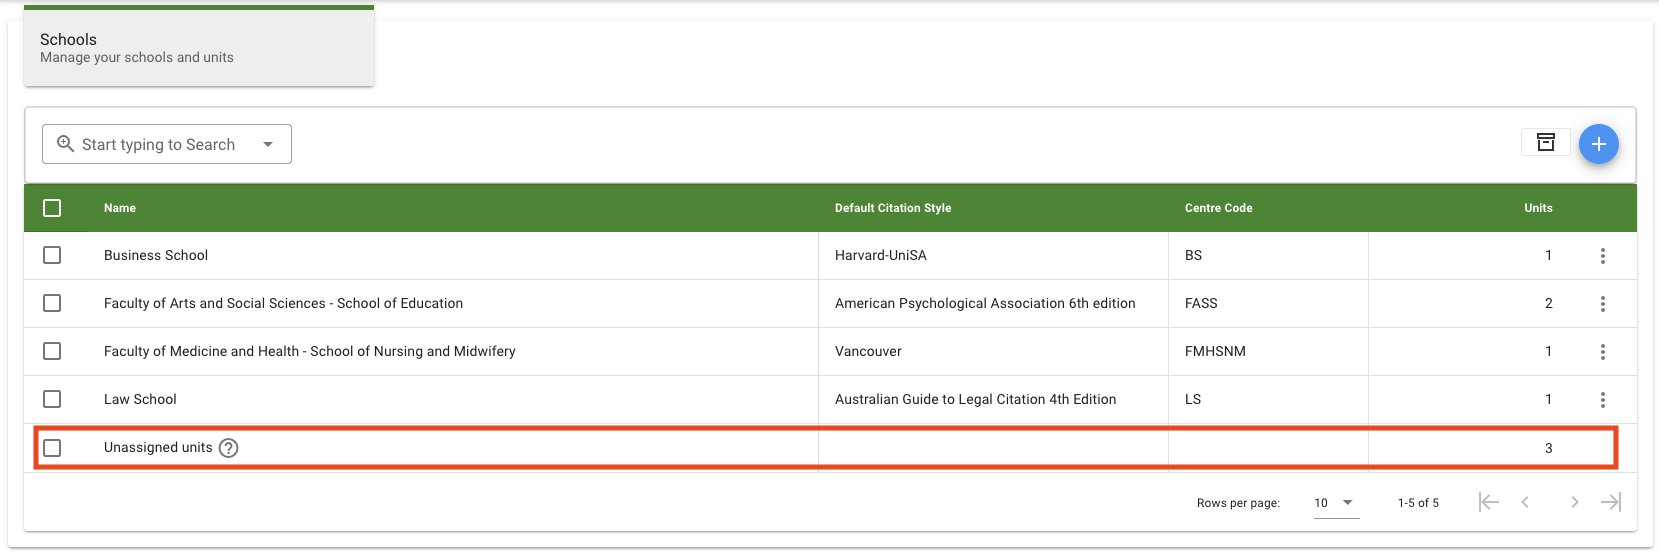
The final row of the schools list, labelled Unassigned courses, indicates the number courses that have not yet been assigned to a particular school.
Archiving
Archiving a school allows the removal of old schools from selection throughout eReserve Plus, in particular the settings for courses.
To archive a school, click the vertical ellipsis button at the far right of a row and select the Archive option from the menu. A green notification will appear at the top right indicating that school has been archived.
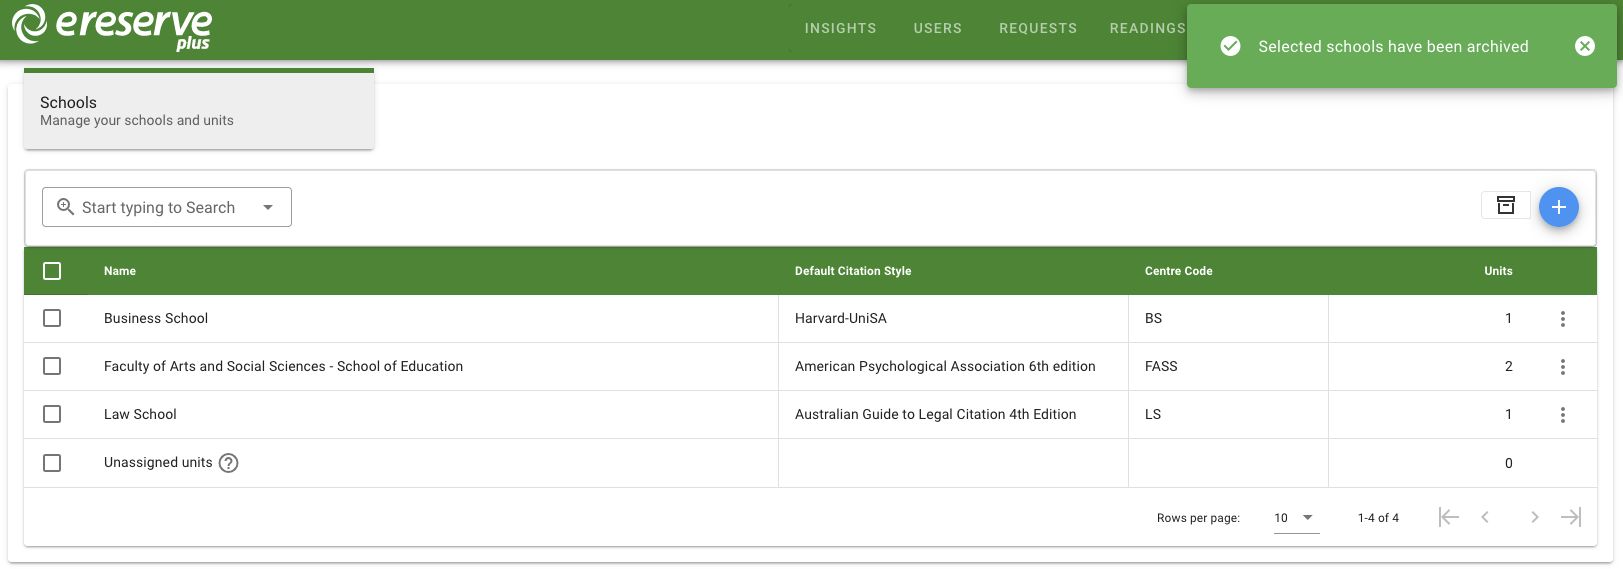
Multiple schools can be archived at once by selecting the checkbox next to each school, or all schools can be selected by clicking the checkbox on the toolbar. When one or more schools have been selected, an Archive button will appear above the top right of the schools list. Click the Archive button to archive the selected schools.

To view and restore archived schools, click the box icon next to the create school button to show the list of archived schools.


Archived schools can be restored by clicking the vertical ellipsis button at the far right of a row and selecting the Unarchive option from the menu.
Multiple schools can be restored at once by selecting the checkbox next to each school, or all schools can be selected by clicking the checkbox on the toolbar. When one or more schools have been selected, an Unarchive button will appear above the top right of the schools list. Click the Unarchive button to restore the selected schools.
To view the currently active schools, click the green box icon next to the new button to show the list of active schools.