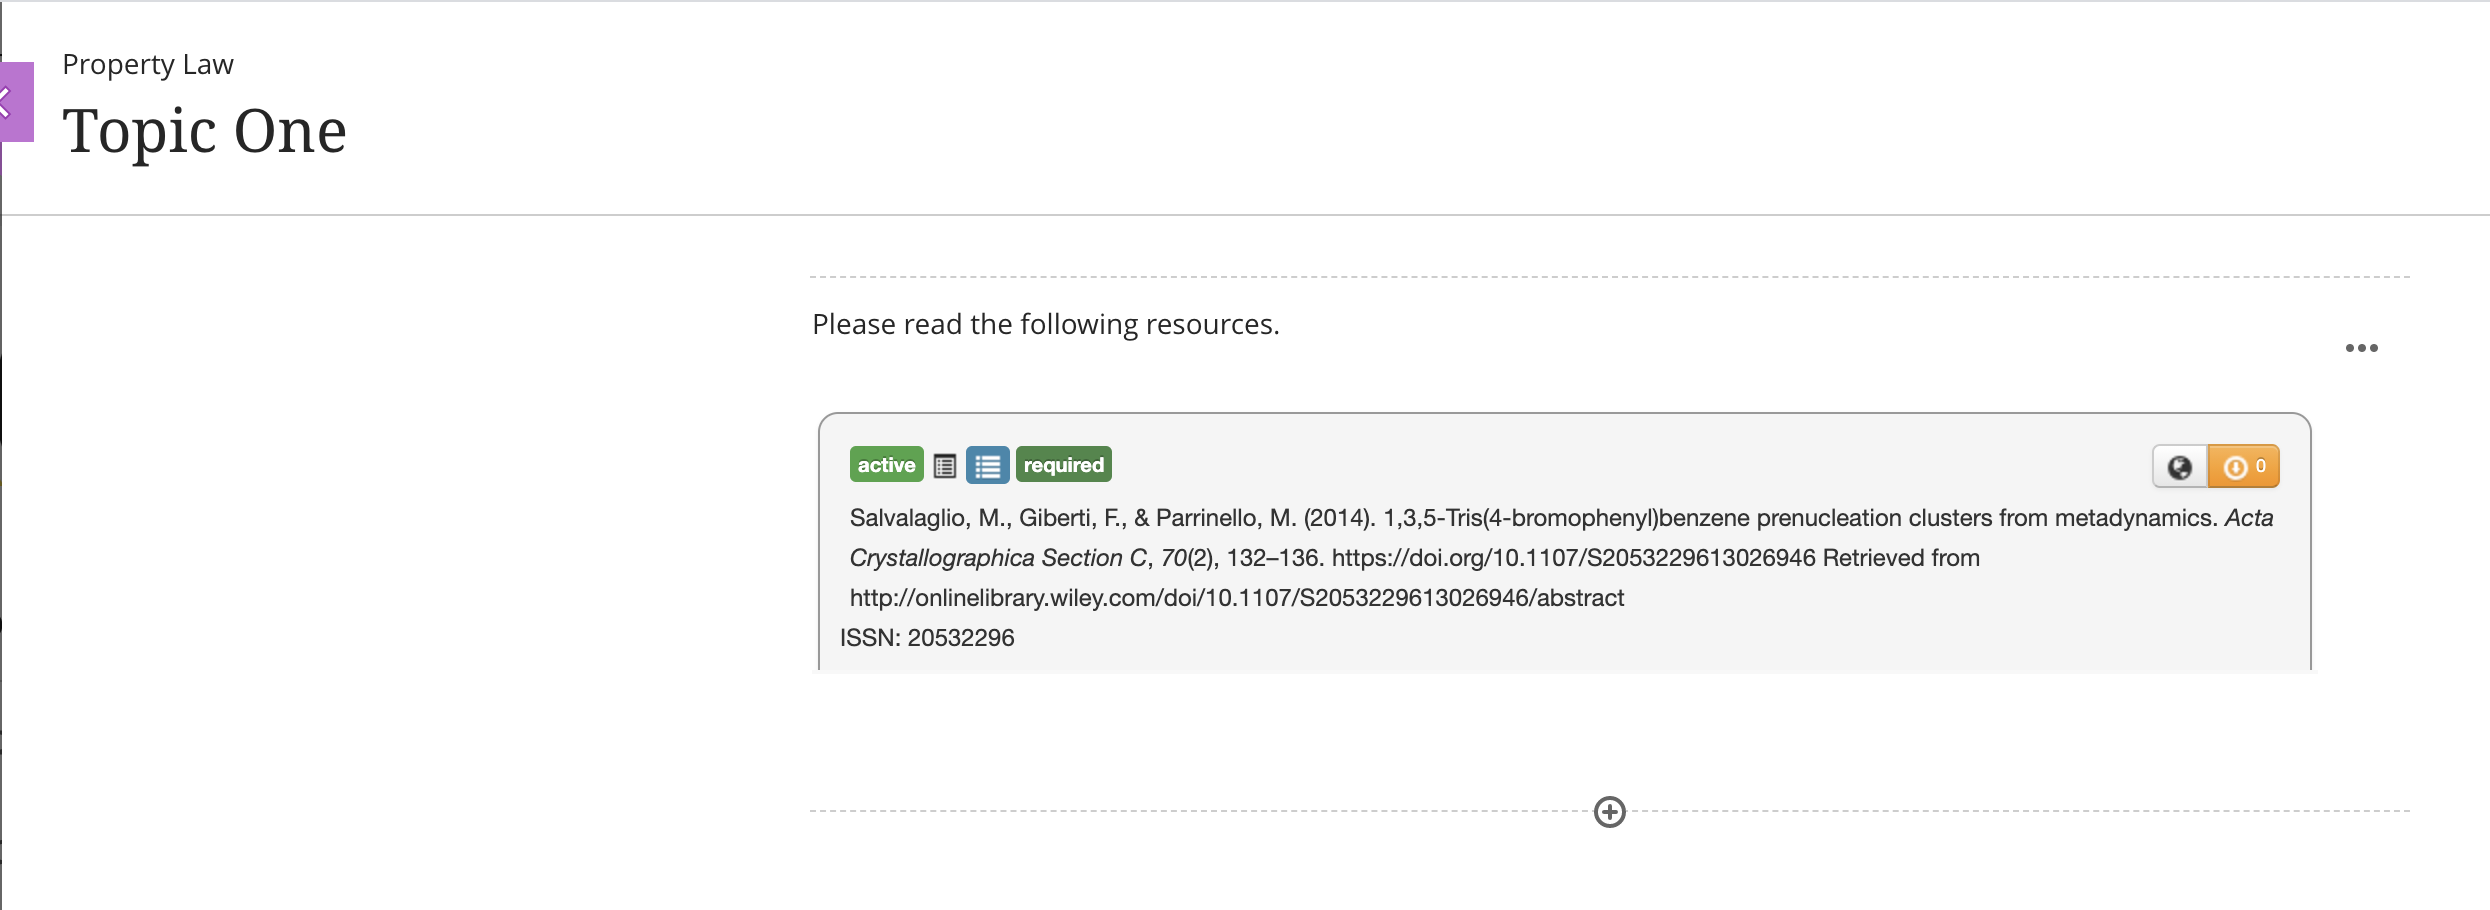
2. Blackboard Integration
Throughout this section of the document are the details on getting your Blackboard Learn instance connected to eReserve Plus using LTI 1.3 and using Resource Linking or Deep Linking. Should you have any questions then please contact the eReserve Support Team at support@ereserve.com.au
2.1 Requirements
The eReserve Plus LTI Tool is regularly tested with the Blackboard Learn SaaS releases supported by Blackboard. It is important to note that we will only be testing against the Blackboard Learn SaaS.
It is also required that a ClientID has also been received from the eReserve Team. If you have not received the ID yet, please contact the eReserve Plus support team.
Blackboard Learn can only have one LTI Tool per domain so if there is an LTI 1.1 Tool configured for eReserve Plus then that will be required to be deleted prior to configuring an LTI 1.3 Tool
2.2 LTI Tool Providers
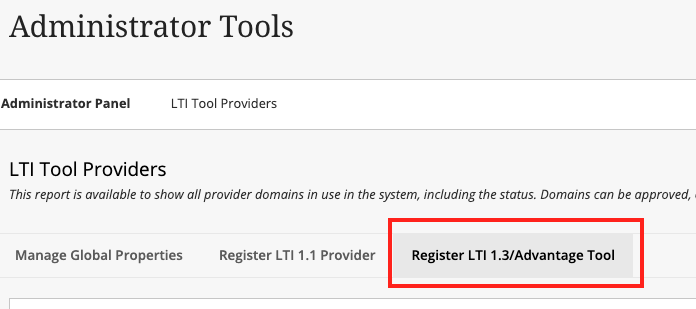
In the Admin Panel for Blackboard, select LTI Tool Providers under Integrations, then select Register LTI 1.3/Advantage Tool.
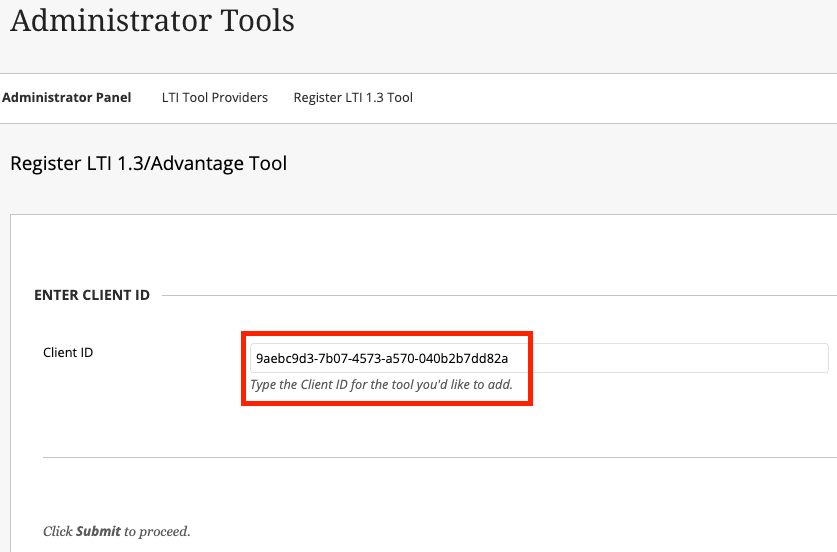
From there, you can enter in the ClientID that has been provided by the eReserve Team.
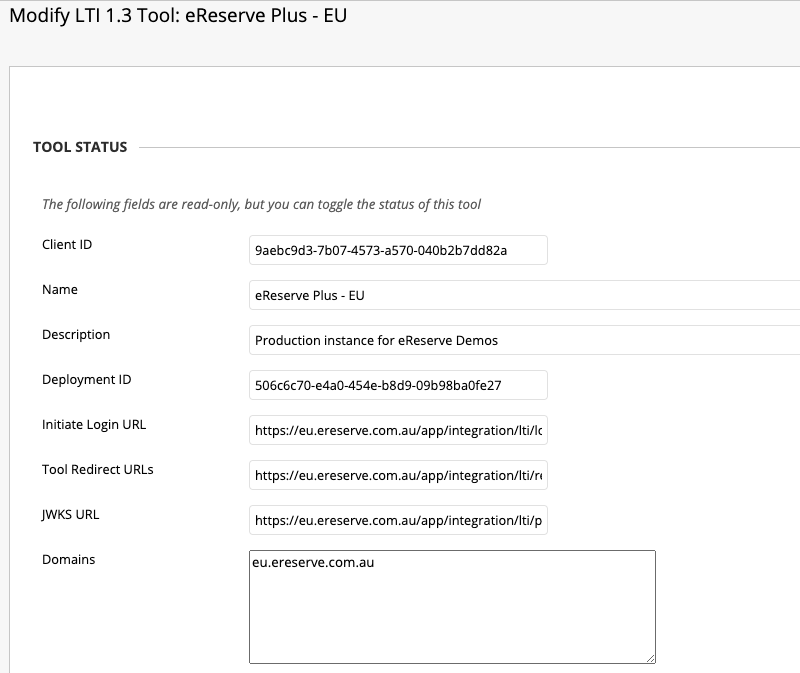
Once the LTI 1.3 Tool has been registered, it will create the tool along with automatically populate the following details:
- Name
- Description
- Deployment ID
- Initiate Login URL
- Tool Redirect URLs
- JWKs URL
The Domain field is required to be populated with the domain of the eReserve Plus environment. i.e. example.ereserve.com.au.
The Tool Status will require to be set to Approved, by default this option is set to Excluded.

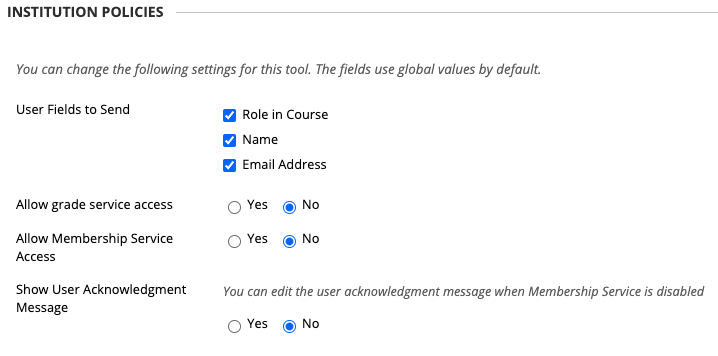
Under Institution Policies, all tick boxes for the User Fields to Send, will require to be Enabled or ticked and for the Service access will require to be set to No as per the following screenshot.
2.3 LTI Tool Placements
In order for course maintainers to link to a Reading List in eReserve Plus in their courses you will need to create placements for the Tool provider created in step 3.2. There will be three different placements required for the LTI 1.3 tool. The placements are Course content tool, Administrator tool and Deep Linking content tool. To create placements for an LTI Tool Provider, the dropdown option can be selected while hovering over an LTI Tool Provider, then Management Placements can be selected. Details for configuration can be found below:
Course Content Tool
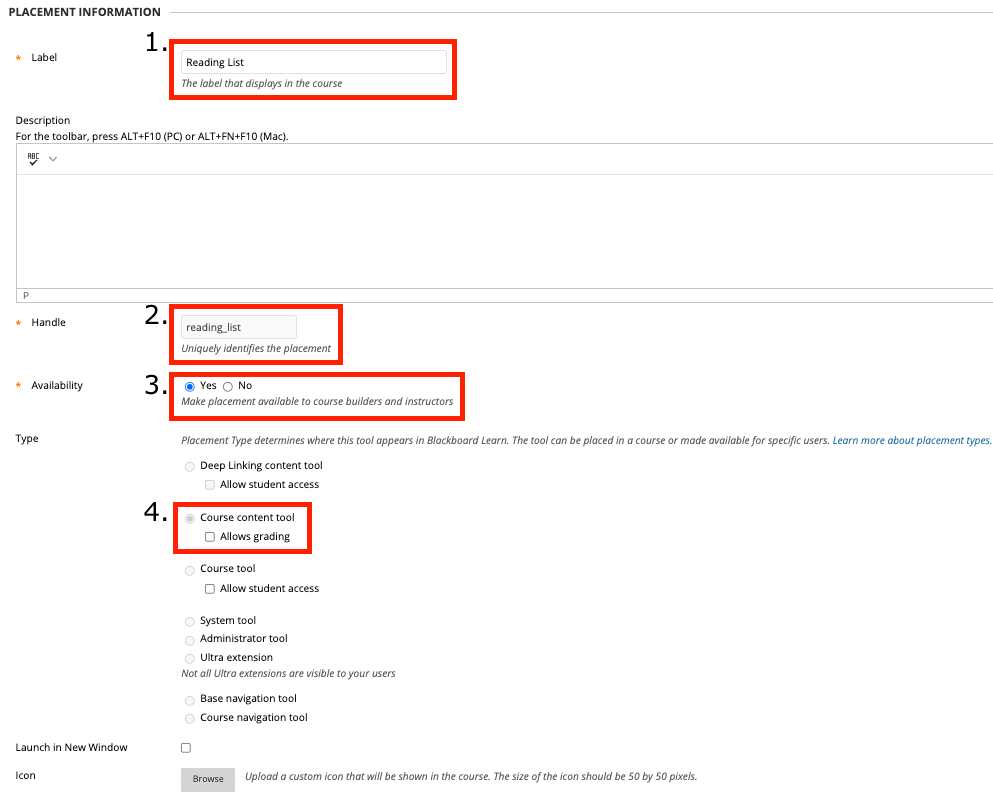
Below will be the required information for the creation of the Course Content Tool placement.
- Label: The placement Label can be named anything you like to suit your institutional vocabulary however we recommend something that is relevant to the placement as this will be displayed in courses.
- Handle: The placement Handle uniquely identifies the placement.
- Availability: The placement Availability will determine whether the placement will be available or not - This should be set to Yes.
- Type: The placement Type will need to be set to Course Content Tool with the Allows Grading option disabled.
The Tool Provider Information will require the Target Link URI to be populated. An example of that link can be found below:
- https://example.ereserve.com.au/app/integration/lti/reading_list/launch where the example.ereserve would be your eReserve domain.

Administrator Tool
Below will be the required information for the creation of the Administrator Tool placement.
- Label: The placement Label can be named anything you like to suit your institutional vocabulary however we recommend something that is relevant to the placement as this will be displayed under Tools and Utilities in the Administrator Tools.
- Handle: The placement Handle uniquely identifies the placement.
- Availability: The placement Availability will determine whether the placement will be available or not - This should be set to Yes.
- Type: The placement Type will need to be set to Administrator Tool.

- https://example.ereserve.com.au/app/integration/lti/reading_list/launch where the example.ereserve would be your eReserve domain.
The Tool Provider Customer Parameter will require to have the following parameter:
- user.system.role=@X@user.role@X@

Deep Linking Content Tool
Below will be the required information for the creation of the Deep Linking Content Tool placement.
- Label: The placement Label can be named anything you like to suit your institutional vocabulary however we recommend something that is relevant to the placement as this will be displayed in courses.
- Handle: The placement Handle uniquely identifies the placement.
- Availability: The placement Availability will determine whether the placement will be available or not - This should be set to Yes.
- Type: The placement Type will need to be set to Deep Linking Content Tool with Student Access disabled.

The Tool Provider Information will require the Target Link URI to be populated. An example of that link can be found below:
- https://example.ereserve.com.au/app/integration/lti/resource_link/generate where the example.ereserve.com.au would be your eReserve domain.

Once the above have been completed, you will be able to Authorise and Activate the LTI1.3 Tool for the creation of Resource Links.
2.4 Authorisation
To Authorise your platform you will need to use the following steps:
- Login as a Blackboard Administrator
- Navigate to the Administrator Tools;
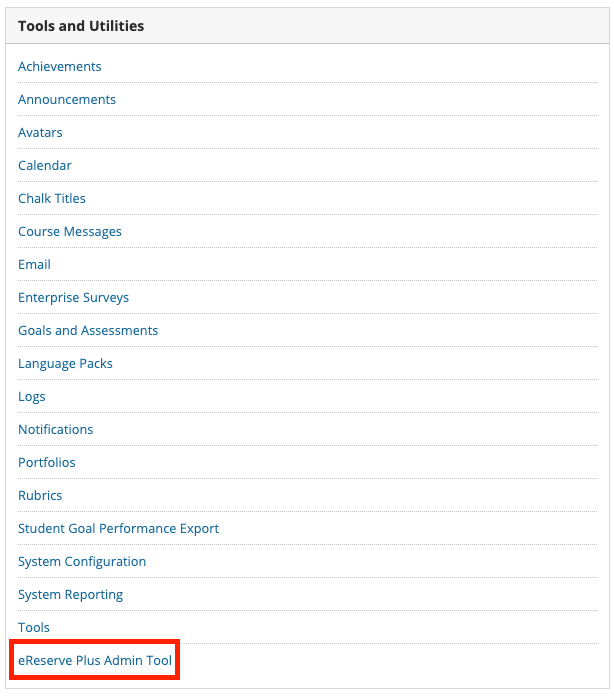
- Click on the eReserve Plus Admin Tool in the Tools and Utilities panel;
(NB: If you have chosen a different eReserve Plus Admin Tool name than what is recommended in Section 3.3 then you will be looking for that name) - You will be present with a Authorise your LMS instance;
- Click on the Authorise button;
- If you have not logged into your institution's eReserve Plus instance then you will be presented with a login page. Login in with an account that has the Site Manager role. If you do not have an account then please contact the eReserve Support Team;
- Once logged in you will see a notice letting you know that the authorisation is complete;
NB: You will need to be logged in as a Blackboard Learn Administrator and also have an eReserve Plus account with the Role of Site Manager in your institution’s eReserve Plus instance which matches your Blackboard Learn instance (i.e. For Staging environment configuration, you will need to have an eReserve Plus account with the Site Manager Role in your eReserve Plus Staging instance to complete the registration).
The first message displayed is the IMS LTI Platform Authorisation which outlines that your platform has not been authorised to use eReserve Plus. In order to Authorise the platform, click Authorise and you will be taken to the Admin interface of eReserve Plus where you will need to have the Site Manager role to complete the authorisation.
On Authorisation you will see a notice appear at the top of the eReserve Plus Integration Management page. This notice will contain details of the success or failure to authorise your LMS to use your institution’s eReserve Plus instance.
2.5 Activation
Once you have authorised the platform (i.e. your LMS instance), you will be asked to refresh your page and then complete the Activation of the Registration (see below) for your platform so that users will be able to access eReserve Plus via the LMS instance.

2.6 LTI Link Placement
Once the LTI Tool Providers (section 3.2) and LTI Tool Placements (section 3.3) have been created/completed, people who are responsible for course content management can put the LTI links in Blackboard Learn courses or templates.
2.6.1 LTI Link Placement within Course Content - Classic Experience
To create a link in course content firstly, make sure that editing for the course is turned on.

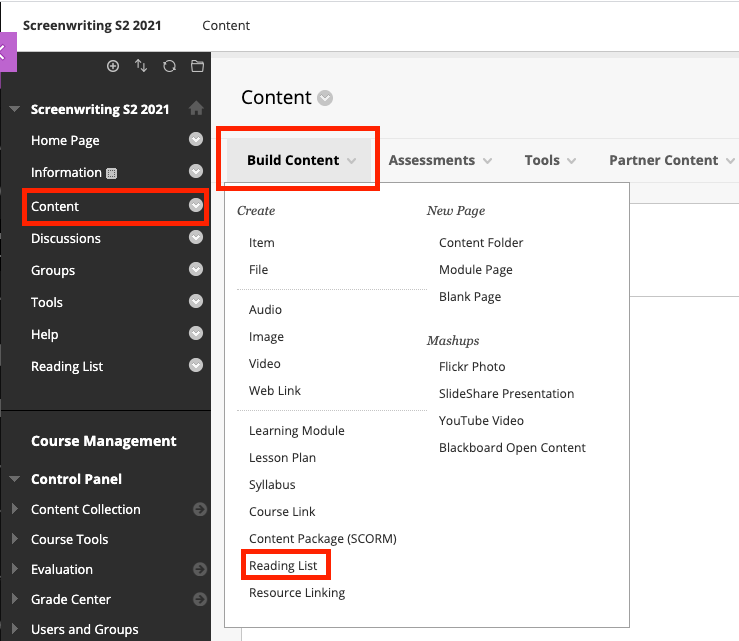
Then navigate to the course content then click on the Build Content and then select the Course Content Tool i.e. Reading List (see below).
Please note that the name Reading List is the name of our placement that we created earlier (see 3.3 LTI Tool Placements - specifically the Course Content Tool)
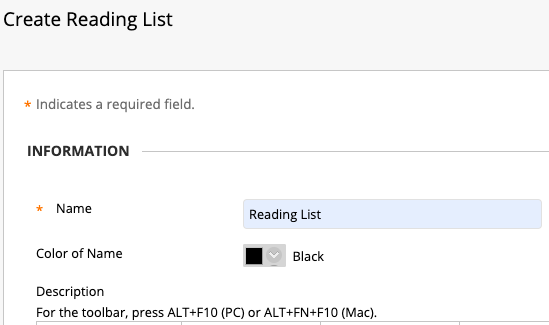
Once you have selected the Course Content Tool, you’ll then see the create form (see below). All you need do is fill in the Name for the link then click on the Submit button. All other fields are optional and can be set as needed.
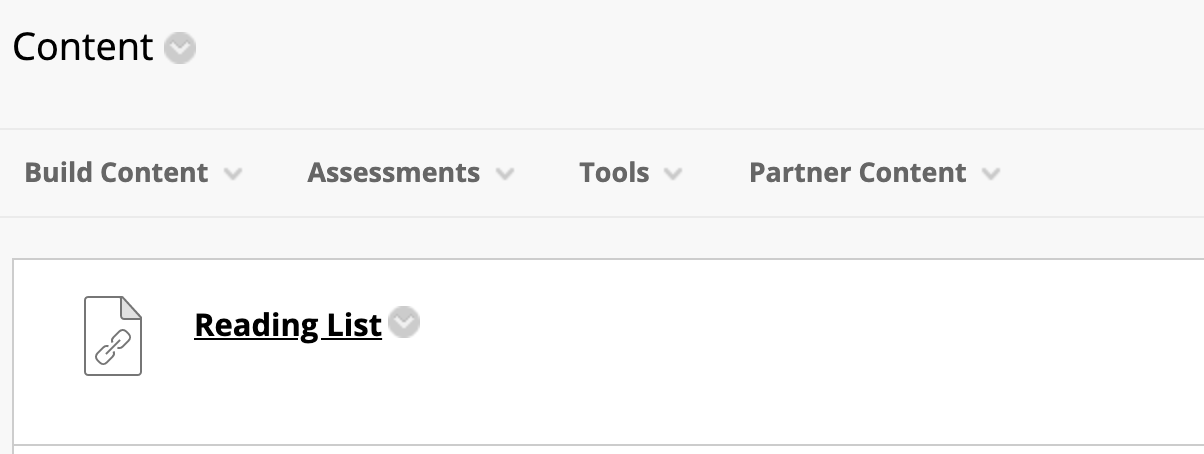
After creating the link it will be displayed in the course content. To get to the reading list for eReserve Plus it’s just a matter of clicking on the link that was created. Depending on your role you will either see a read only reading list (e.g. for students) or the reading list management (e.g. for course builds, academics, etc.)
2.6.2 LTI Link Placement within Course Menu - Classic Experience
Within your courses you can create a link in the course menu to eReserve Plus using Course Links. To create the link in the course menu you must have already created a Course Content Tool (see 3.6.1). Once you have the Course Content Tool you can use the following steps to create a link in the course menu.
1. Make sure course editing is turned on.

2. Click on the Add Menu Item button
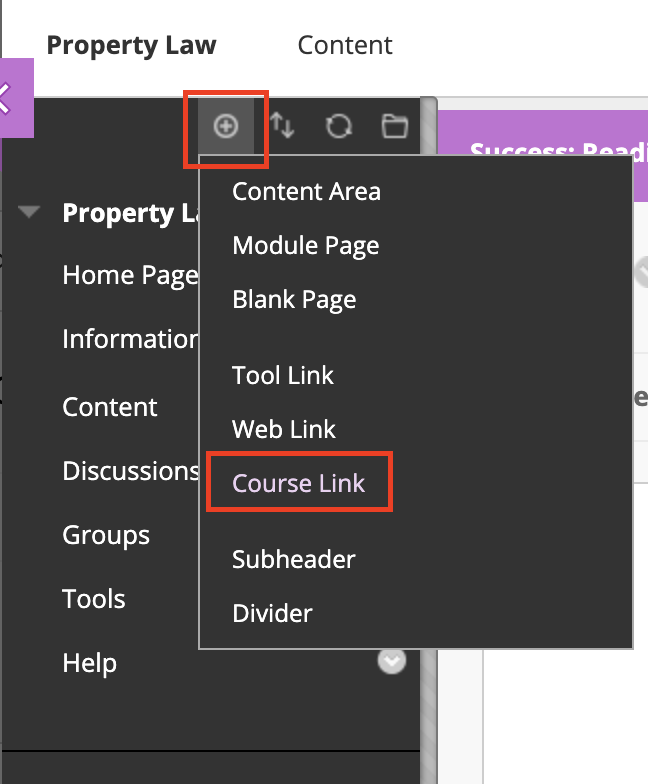
3. Click on the Course Link menu item.
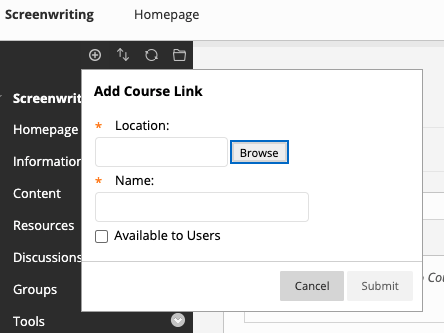
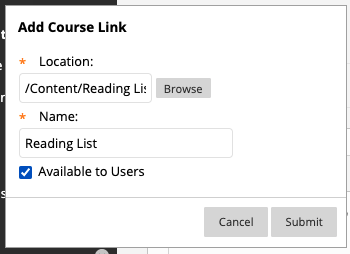
4. Once clicked, the Add Course Link form will be displayed (see below). Click on the Browse button to select the Location.
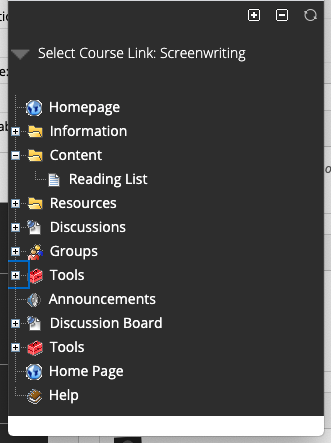
5. Once clicked, you will see the Select Course Link form. Choose the content link you created earlier by clicking on it. In the example below it’s the Reading List in the Content folder.
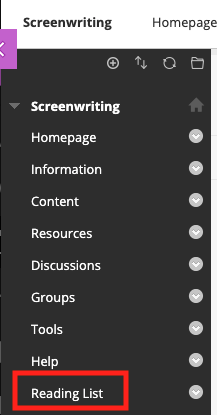
6. Once you’ve selected the content link tick the Available to Users checkbox, change the Name as you see fit then click on the Submit button. The link will now appear in the course menu.
2.6.3 LTI Link Placement - Ultra Experience
To create a link in course content, first select the create menu and select the Content Market menu item.
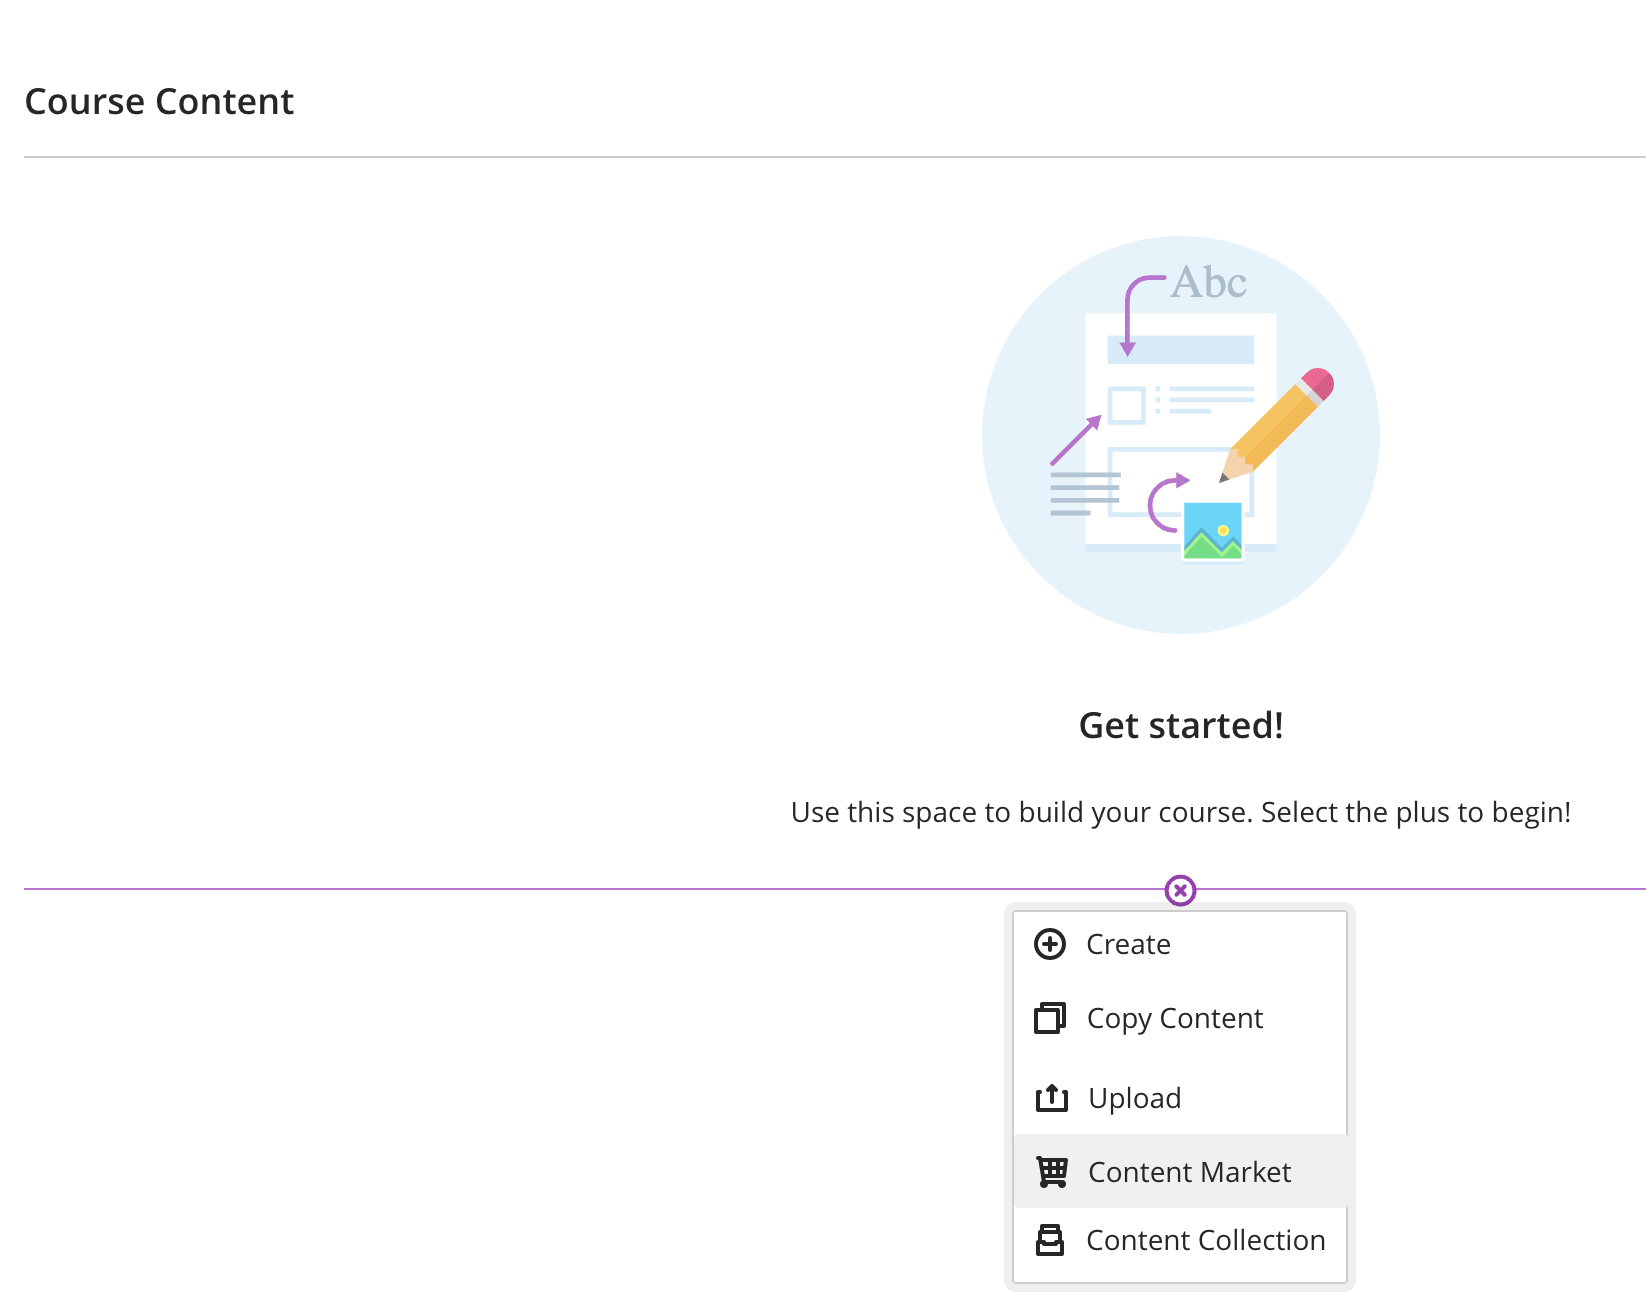
From there, hover over the Course Content Tool that we created earlier (in this case it is labelled Reading List DEV) which is under Institution Tools and select the plus symbol in the button right corner.
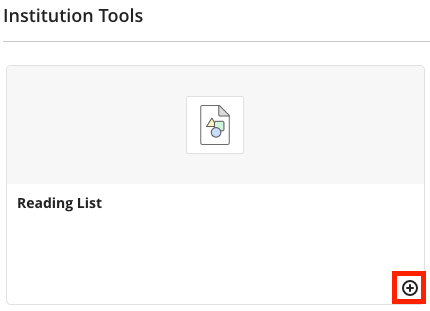
Once selected, it will automatically be added to the Course Content section. Hovering over it, you can click on the ellipse to edit and change the name and make it available to student.

2.7 Editing the Registration Form
To edit the Registration Form or to change details such as the Course Code Filter or LTI Role Access, you will be required to be logged in as an Blackboard Administrator.
From there, you will need to navigate to Admin and at the bottom of Tools and Utilities, there is an eReserve Admin menu item. Once selected, it will take you to the Re
2.8 Resource Linking with Blackboard
Once the LTI Tool Providers (section 3.2), LTI Tool Placements (section 3.3) and the LTI Link Placements (section 3.6) have been created/completed, people who are responsible for course content management can put the LTI links in Blackboard Learn courses.
2.8.1 Resource Linking - Classic Experience
For the Classic Experience of Blackboard, you will be able to use the following documentation to create Resource Links. To add and create Resource Links, navigate to Course and select Content. Once there, select the Build Content dropdown and select the Resource linking tool that was created earlier (this will be named when the Deep Linking Content Tool was created in section 3.3 - In this case, it has been labelled Resource Linking).
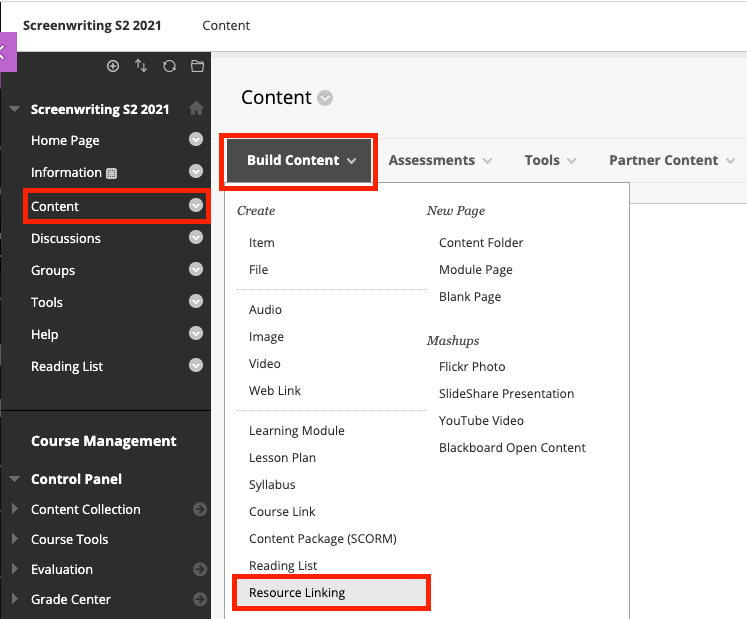
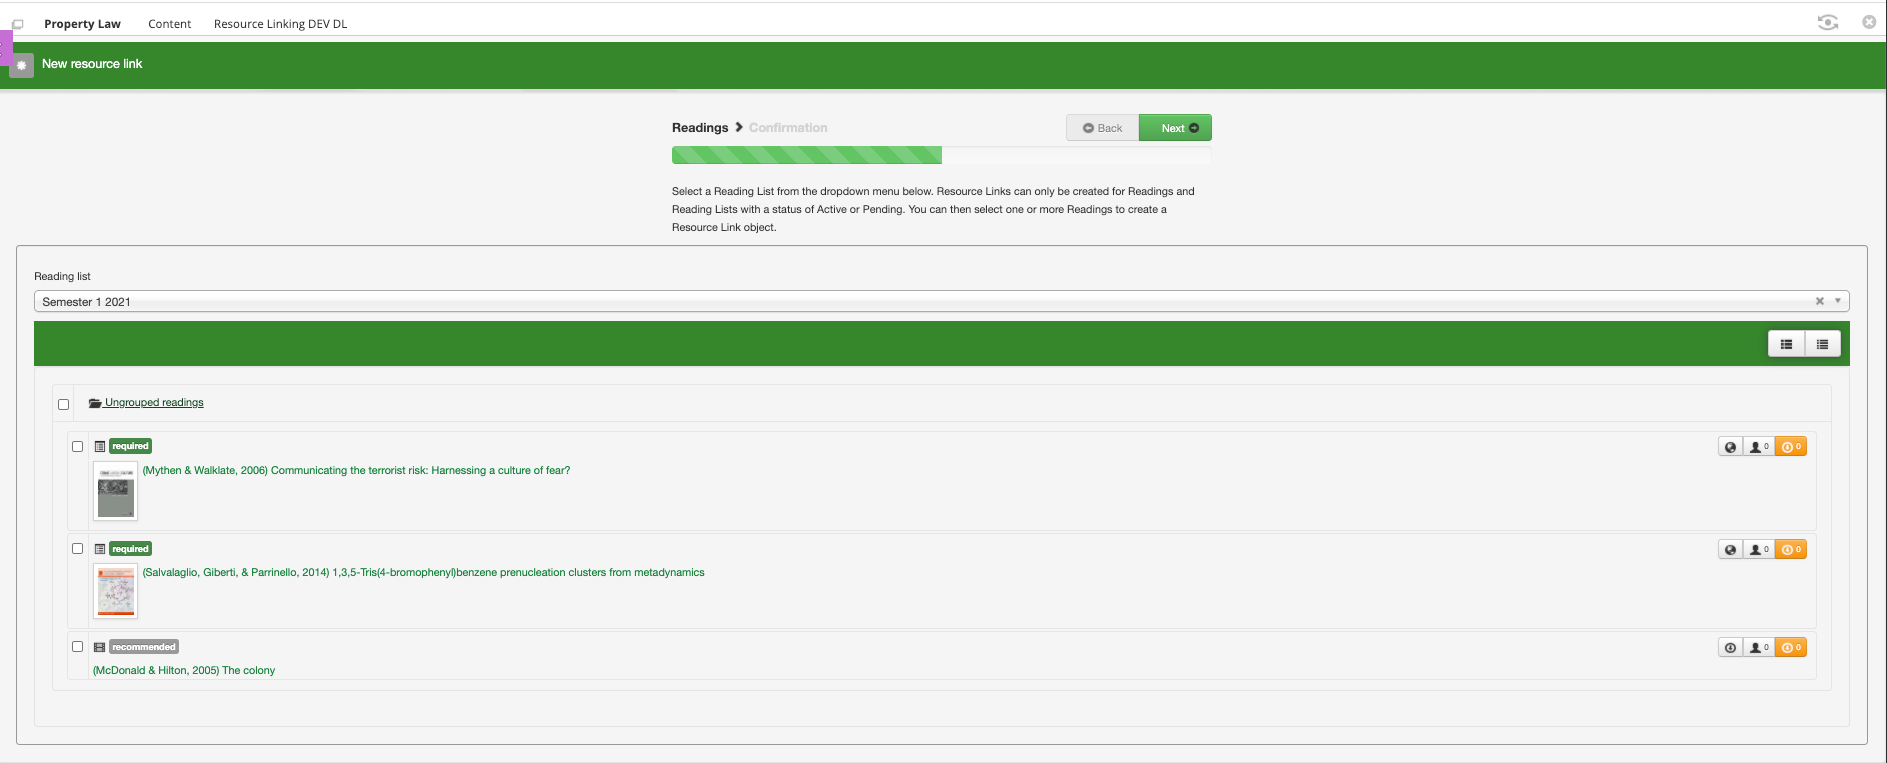
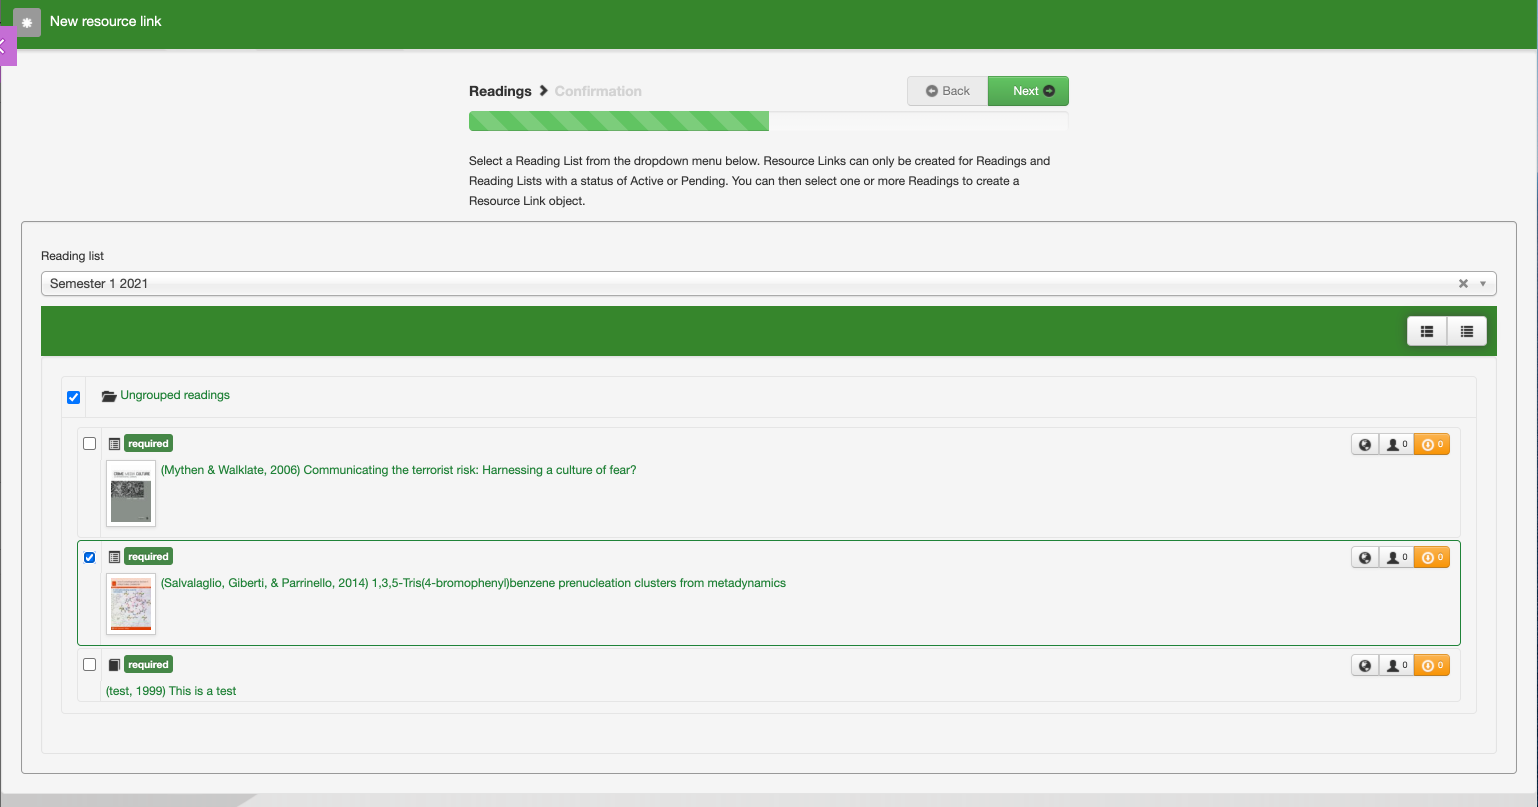
From there, it will take you through the steps to select a Reading List and Resources to add.

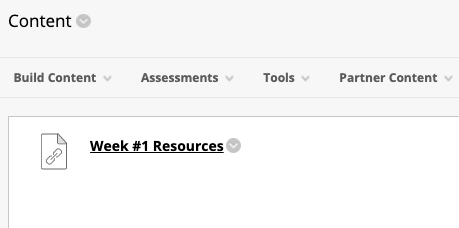
Once the link has been created, it will display by default as LTI Link however this can be changed by editing the Content item and changing the name to suit.
2.8.2 Resource Linking - Ultra Experience
For the Ultra Experience of Blackboard Learn, you will be able to use the following documentation to create Resource Links within Course Content.
Resource Links can be created and added where there is an HTML editor (i.e. Documents and Discussion)
A video can be found on how to create Resource Links below.
For the following documentation, we will create a new Document. To add and create Resource Links, navigate to create a new Document (see below) and select the menu item to create new course content.
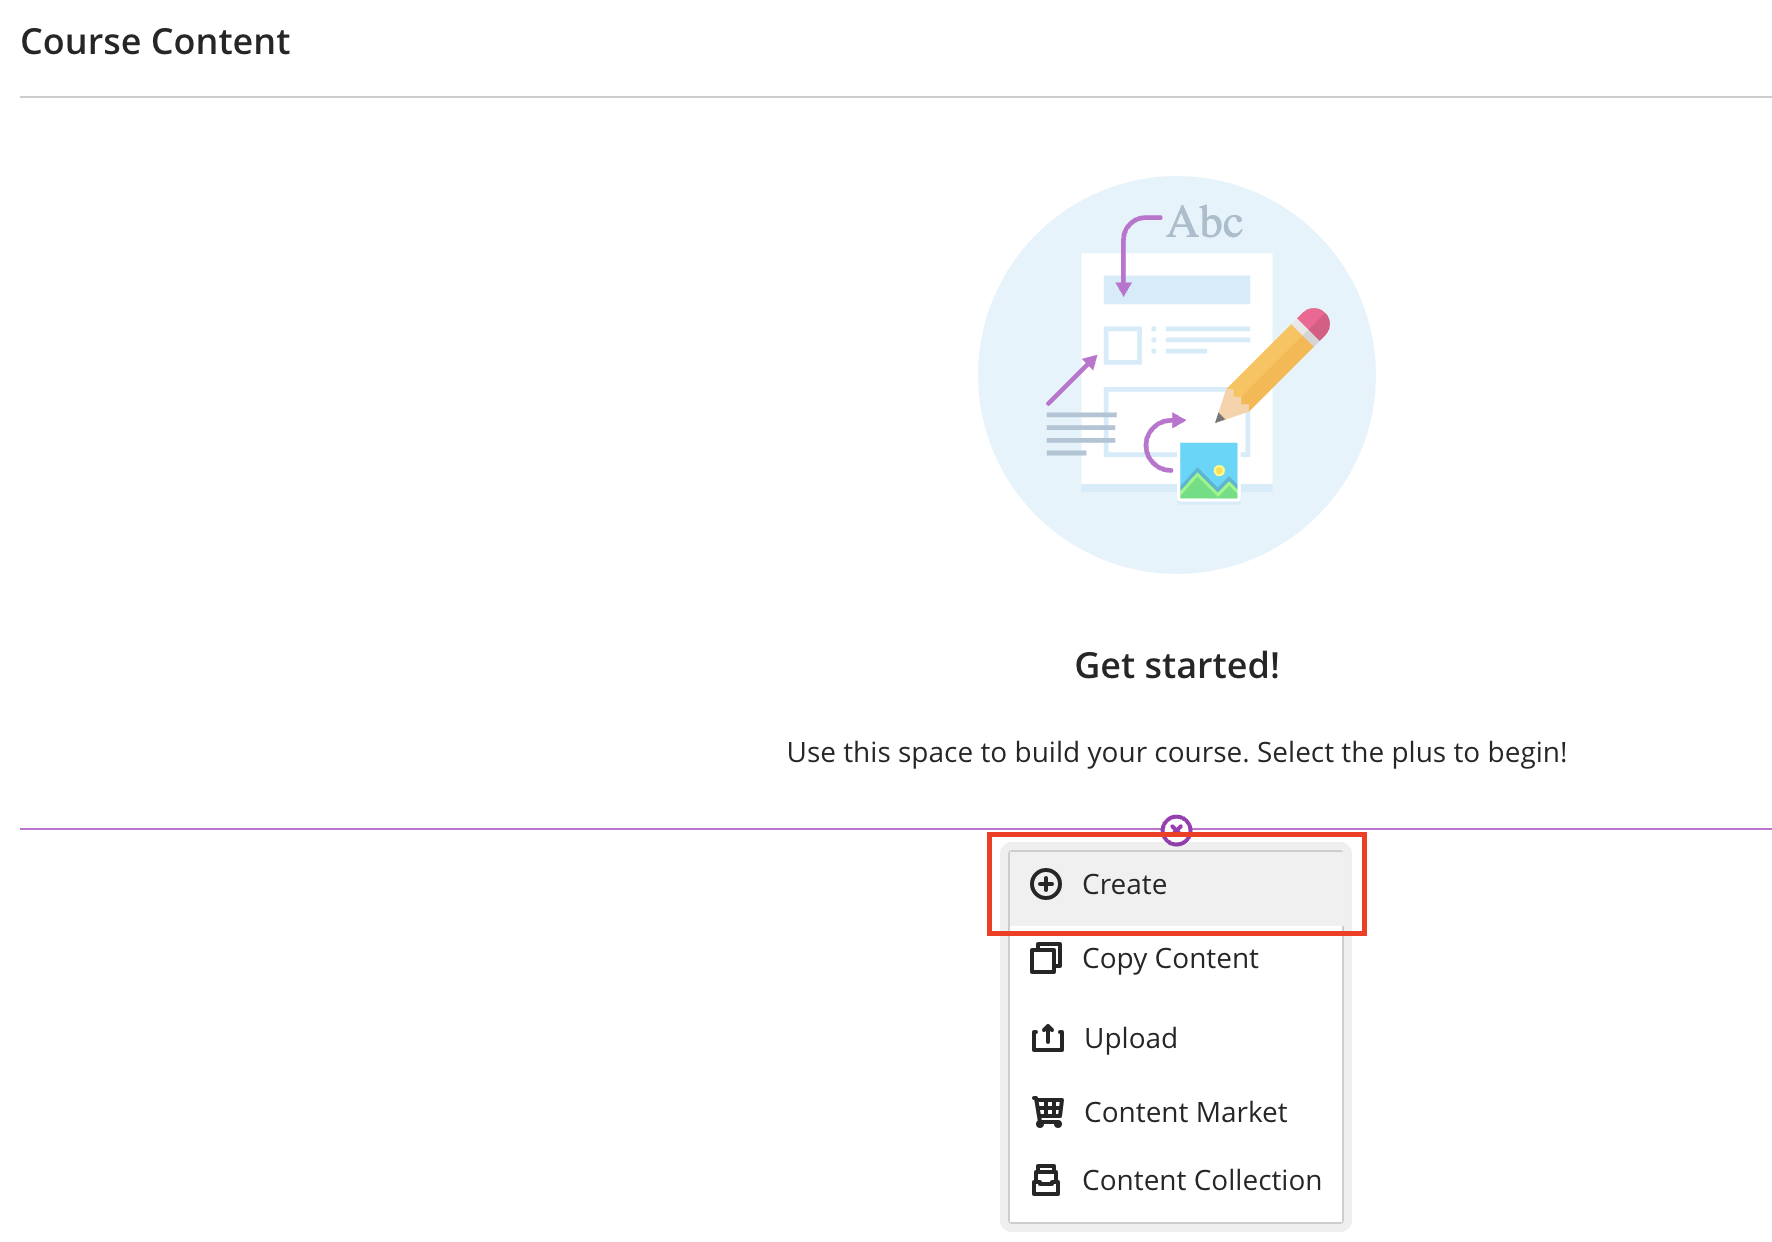
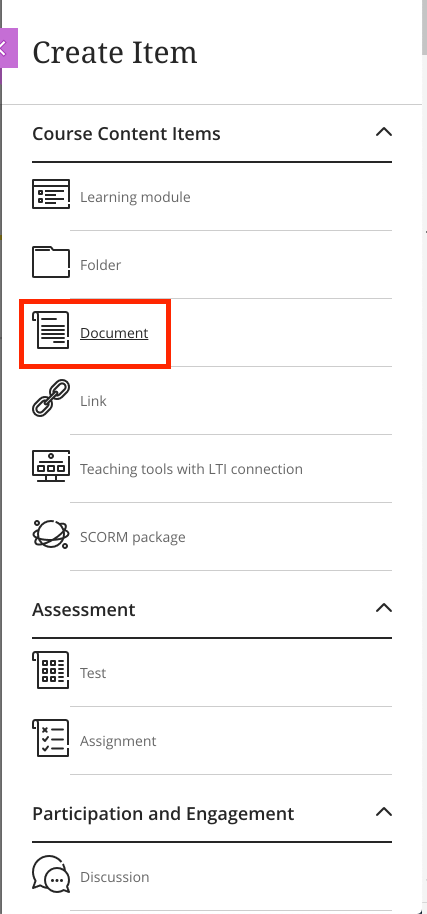
Once selected, select to create a new Document.
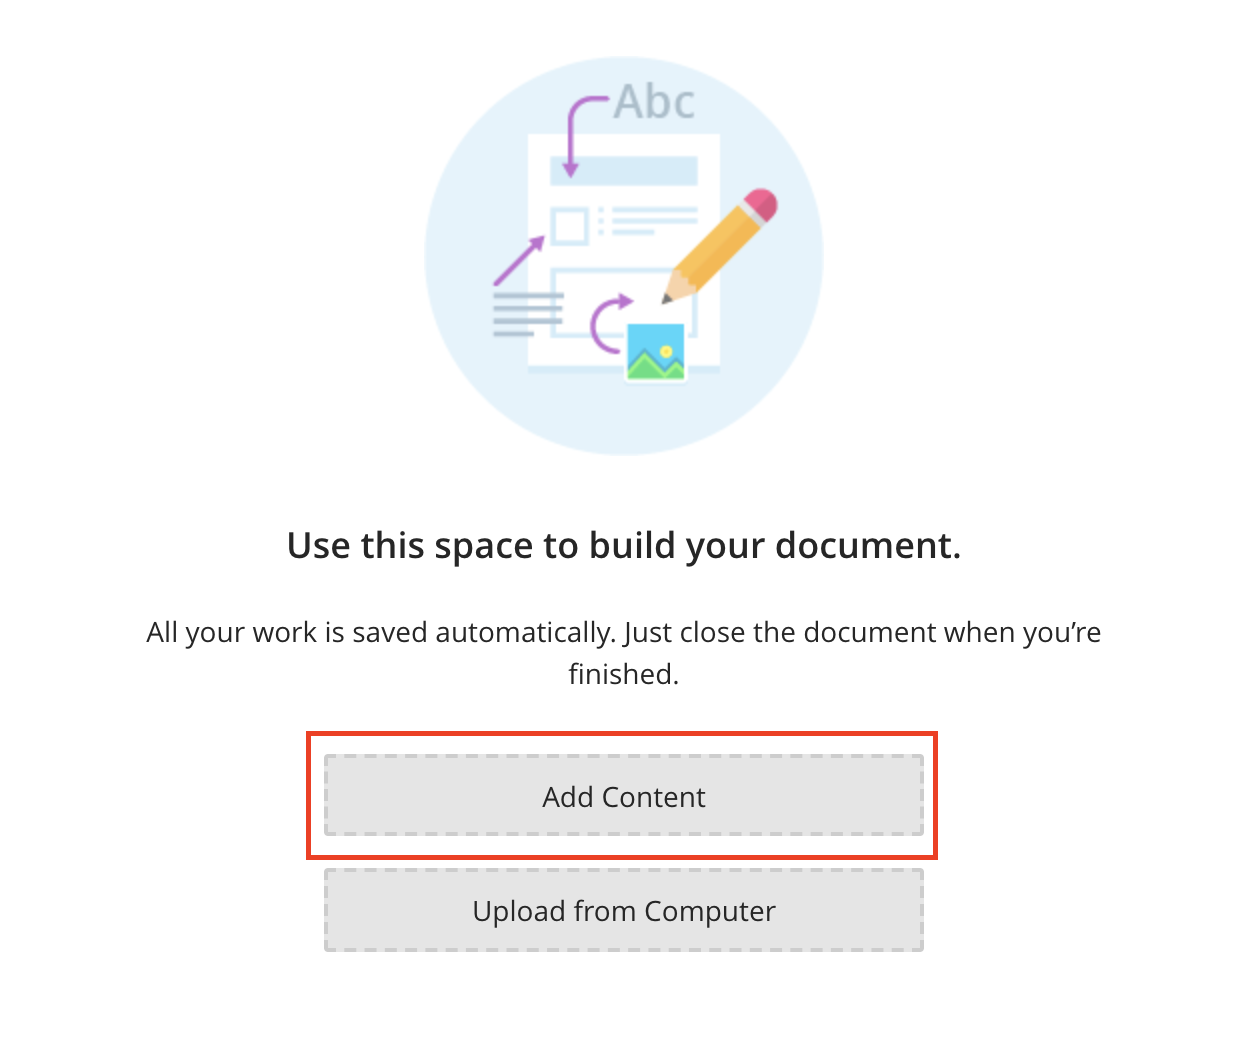
From there, select Add Content.
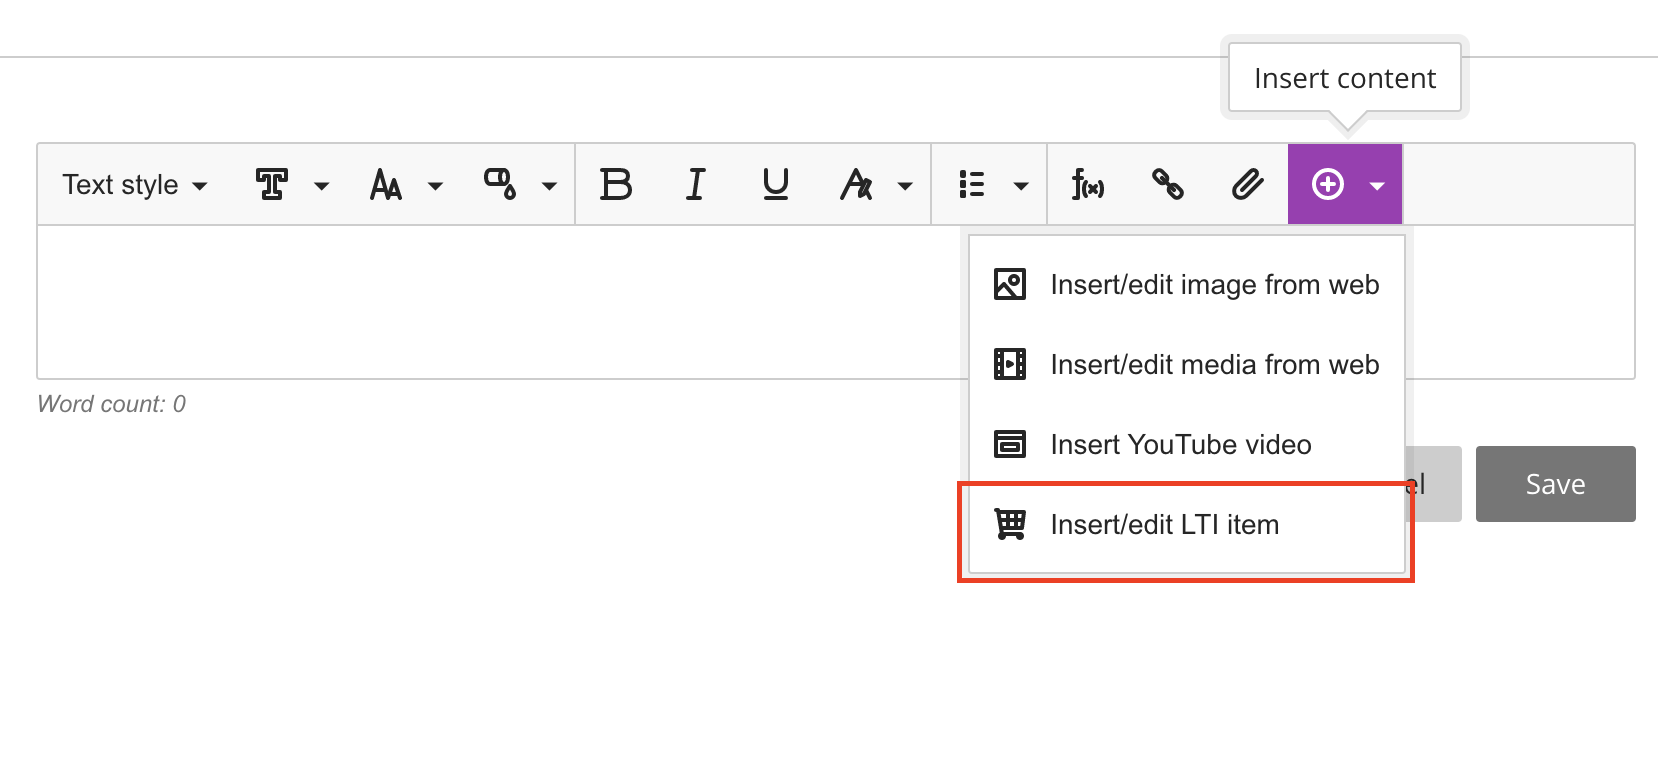
You will be presented with an HTML Editor. Select the Insert Content dropdown fromt he menu and select Insert/edit LTI item
Under Institution Tools, select the Deep Linking Content Tool that was created earlier in section 3.3 of this document - In this case, it has been labelled Resource Linking.
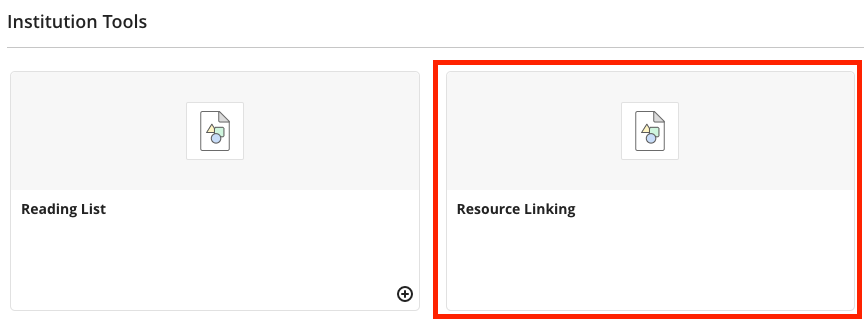
Once selected, you will be presented to select a Reading List and resources to add as Resource Links.


Once the Resource Link/s have been selected, created and resized, it will display in the document HTML editor.
